Configuration for Home Assistant YAML part one
Note
The new Gateway firmware V2.0 and higher have a new MQTT auto-discovery feature for Home Assistant. See HERE.
The firmware of the Gateway was built with Home Assistant in mind. The Gateway will communicate with Home Assistant via MQTT. Aside from the easy way via the MQTT Discovery Protocol, you can do it the hard way via YAML. To add Gateway functionallity to Home Assistant, you need to edit and add several YAML files.
If you start fresh with Home Assistant some of the things you need to do to set it al up may seem daunting, but usually you get along with the basics pretty quickly.
For more information on how to integrate with HA please consult Proddy’s Github repository 2.
Getting Home Assistant ready for the Gateway
For this guide I assume you don’t know much about Home Assistant but that you do already have it installed on your system. You can install f.i. HassIO on a Raspberry Pi, or install Home Assistant in a Docker container. Its up to you to decide. If you don’t have it installed yet please follow the Home Assistant getting started 3 instructions on the Home Assistant website
What are those YAML files?
Home Assistant uses YAML files to store all configuration. The main configuration file is called configuration.yaml, and depending on the types of integrations in your system, there will be several other YAML files like scripts.yaml, sensors.yaml etc. The YAML files are located in the root installation folder of where you installed Home Assistant. These YAML files are basically just text files with instructions for Home Assistant. In this guide you will need to add some new YAML files to your system and you need to add parameters to existing YAML files.
You can use f.i. WinSCP or another SFTP client to copy new YAML to your system and to modify them you can use the same program or open a terminal to your system with f.i. Putty 1.
If you copy new files to your system, and it says there is already a file with the same name, do not overwrite the existing files as these contain parameters for other Home Assistant components. Instead add the contents of the new files to the existing files.
If you just installed Home Assistant only these files will be present:
configuration.yaml
automations.yaml
groups.yaml
scenes.yaml
scripts.yaml
secrets.yaml
MQTT
The Gateway communicates with Home Assistant via MQTT. For this to work you need to have a MQTT server (also called a broker) installed on your system. The recommended MQTT broker is Mosquitto. Please follow the guide Home Assistant running your own MQTT broker 4 to install it.
After Mosquitto is installed, add the following to configuration.yaml:
# Example configuration.yaml entry
mqtt:
  broker: 192.168.1.100
And use the IP address of the machine Mosquitto is installed on instead of ‘192.168.1.100’.
Adding the YAML configuration
Adding the preconfigured YAML files
Now that Home Assistant is ready to receive and send data via MQTT, you can add all the YAML configuration. Proddy did a nice job of preconfiguring most of the parameters so you only have to copy-paste some preconfigured files.
Copy all YAML files from Proddy’s Wiki 5 into the root installation folder of Home Assistant.
If files already exist, copy the contents of the new files into the existing files.
Extending configuration.yaml
Add the following to the end of configuration.yaml
script: !include script.yaml
sensor: !include sensor.yaml
switch: !include switch.yaml
notify: !include notify.yaml
climate: !include climate.yaml
automation: !include automation.yaml
binary_sensor: !include binary_sensor.yaml
These are links to tell Home Assistant there are more YAML files to look for. If your system already has one or more entries from the list above, just omit them as they are already linked.
Please note for this integration the ‘s’ is omitted from the file names. So a default Home Assistant YAML file is called sensors.yaml, but here it is sensor.yaml. This way you don’t overwrite existing files.
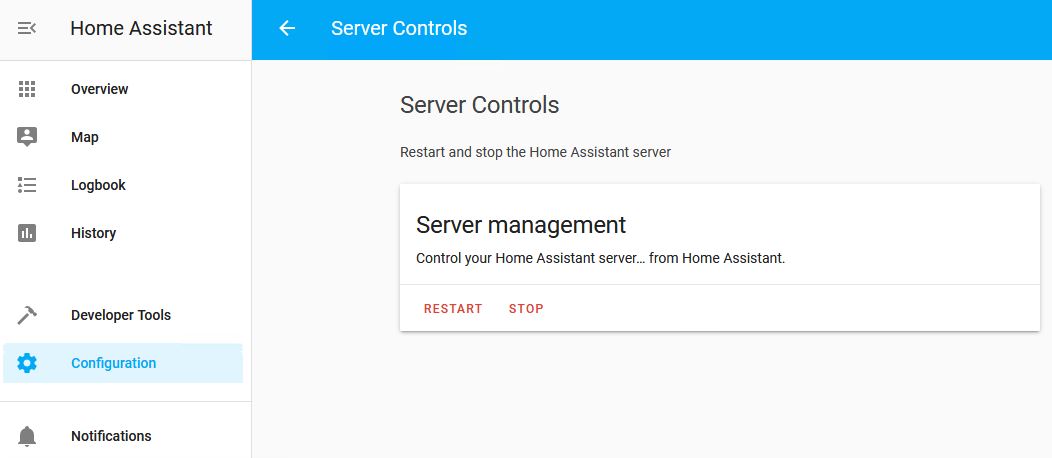
Now if you added all the includes and the MQTT broker address, restart Home Assistant via its web interface. Go to Configurations->Server Controls -> Server Management -> Restart.
Checking if it all works
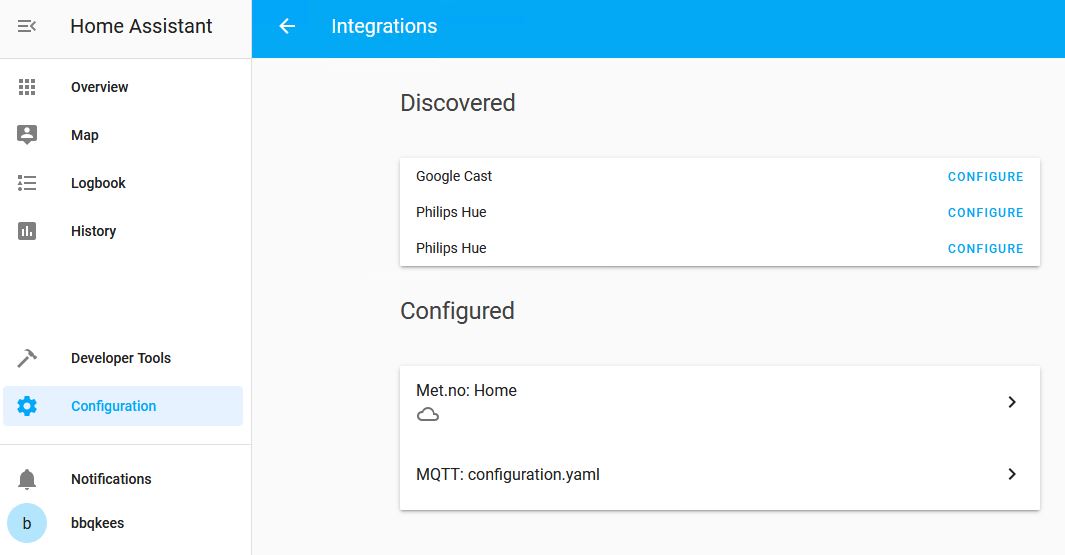
Now after reboot go to Configurations->Integrations and see if MQTT has appeared.
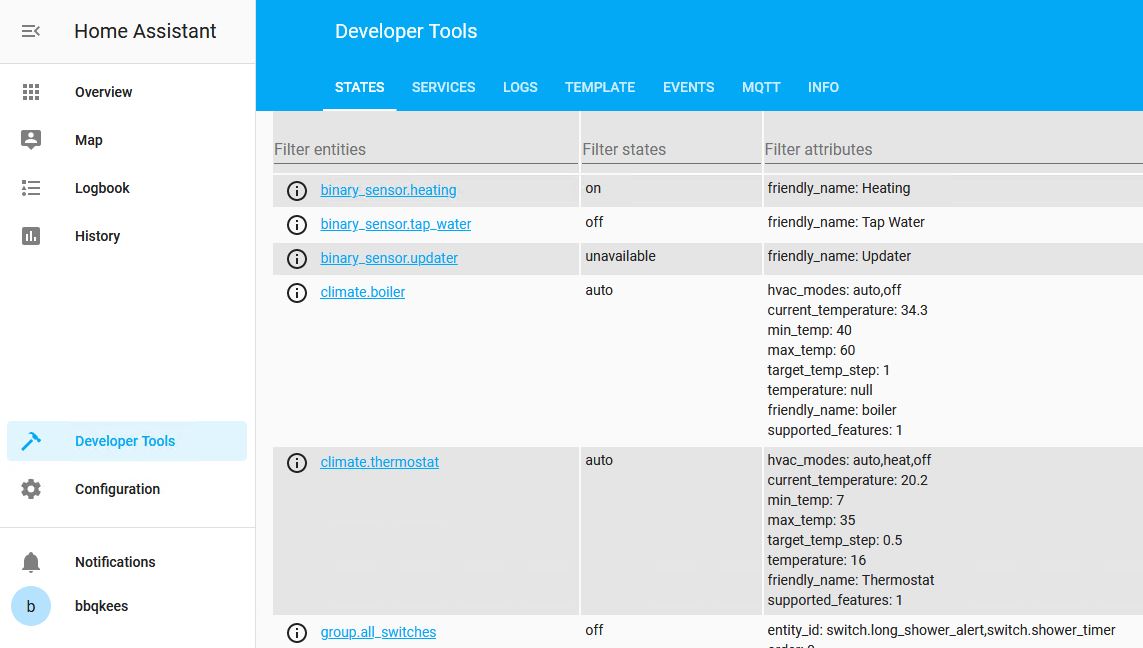
Congratulations, you got MQTT working in Home Assistant. Now wait a few minutes and go to Developer Tools->States. You should see a whole list of new devices from the Gateway.