Connecting the Gateway to your home network
After you connected the Gateway to your boiler and the blue LED blinks slowly (preferably 2 flashes) or in case of a RGB LED you see a blue light blinking, you need to integrate the Gateway into your home network. To setup the Gateway you need a laptop or other computer with a web browser (or your smartphone).
Note
If you have an E32 V2 and connected it via Ethernet (wired LAN), the LED of the Gateway will light continuously, or blink blue just once. This means that a network connection has been established. The Gateway has connected via DHCP to your router. You can log in to the Gateway in your local network via the IP address the router gave to the Gateway or or try the host name http://ems-esp or http://ems-esp.local. If Ethernet is active, the ems-esp wifi network will not become active.
Furthermore please note that Ethernet is disabled automatically when something has been filled in in the WiFi settings page.
Accessing the web interface of the Gateway
You need to change several setting in the web interface of the Gateway for it to connect to your home network. In order to do so, you need to access the web interface. If you already connected an E32 V2 via Ethernet, see the note above. In all other cases search for the WiFi network ‘ems-esp’.
Item |
Default value |
|---|---|
Wi-Fi network name |
ems-esp |
Wi-Fi network password |
ems-esp-neo |
Default user |
admin |
User password |
admin |
When you get it delivered, the Gateway is in its factory condition. At first boot the Gateway will create a WiFi network called ‘ems-esp’ and the default password is ‘ems-esp-neo’.
Connect to this network with a laptop or smartphone. (Keep in mind as soon as you are connected to the ems-esp network, you cannot access the internet with the laptop.) Open a web browser and go to IP address http://192.168.4.1 (or try the host name http://ems-esp or http://ems-esp.local).
A login screen will be shown. You can choose the preferred language here as well.
You will be asked for a user name and password. The default user name and password are both ‘admin’.
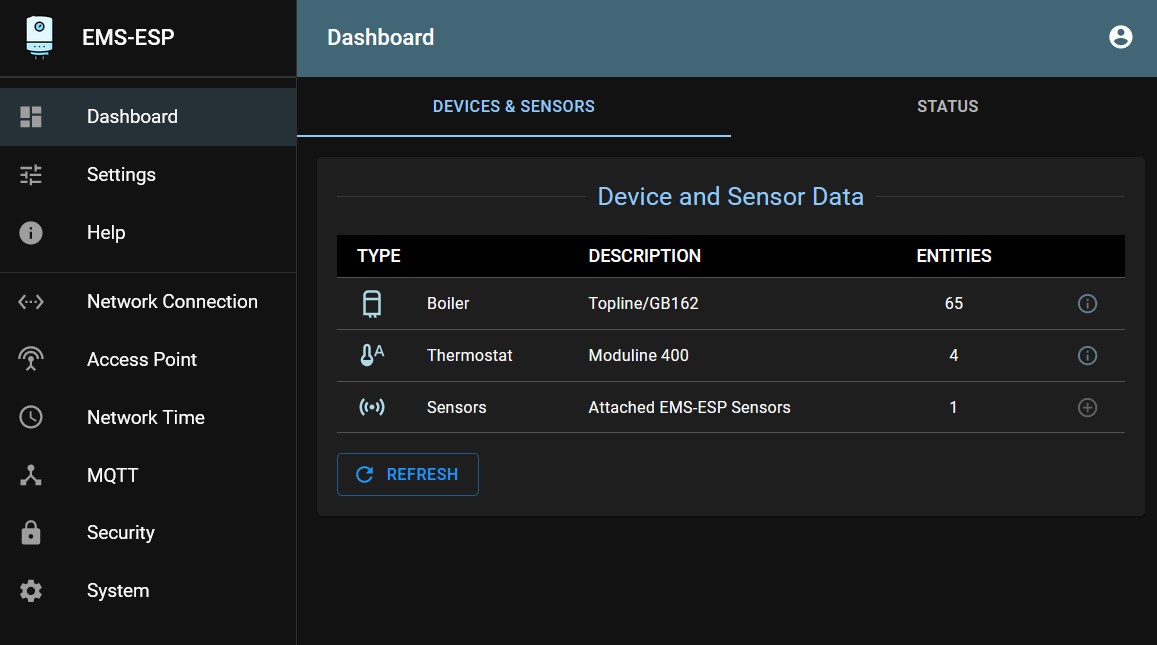
You will now see a mostly empty screen with a menu on the right that resembles the following one:
Note
In firmware 3.7.0 the defaulf dashboard has been changed to a favorites page. The device overview is still there but one level lowel. Because there are manu ongoing firmware changes, please also check the documentation in parallel to this wiki to ensure you have the latest information. See: https://docs.emsesp.org.
If you like to change the language if you did not do so before the login, you can still do it now. Select the user in the bottom left and change the language to your preferred one.
After you have configured the Gateway, the main dashboard will give you an overview of your favorite entities.
On the devices page it will show what it has found on the EMS bus. If it has found a boiler, a thermostat and/or a mixer module etc it will show its main parameters.
Note
If your boiler/heatpump or other EMS device is not recognized on the bus we may need to add the ID to the database, please go to the Help page in the web interface and open an issue on the firmware repository from there.
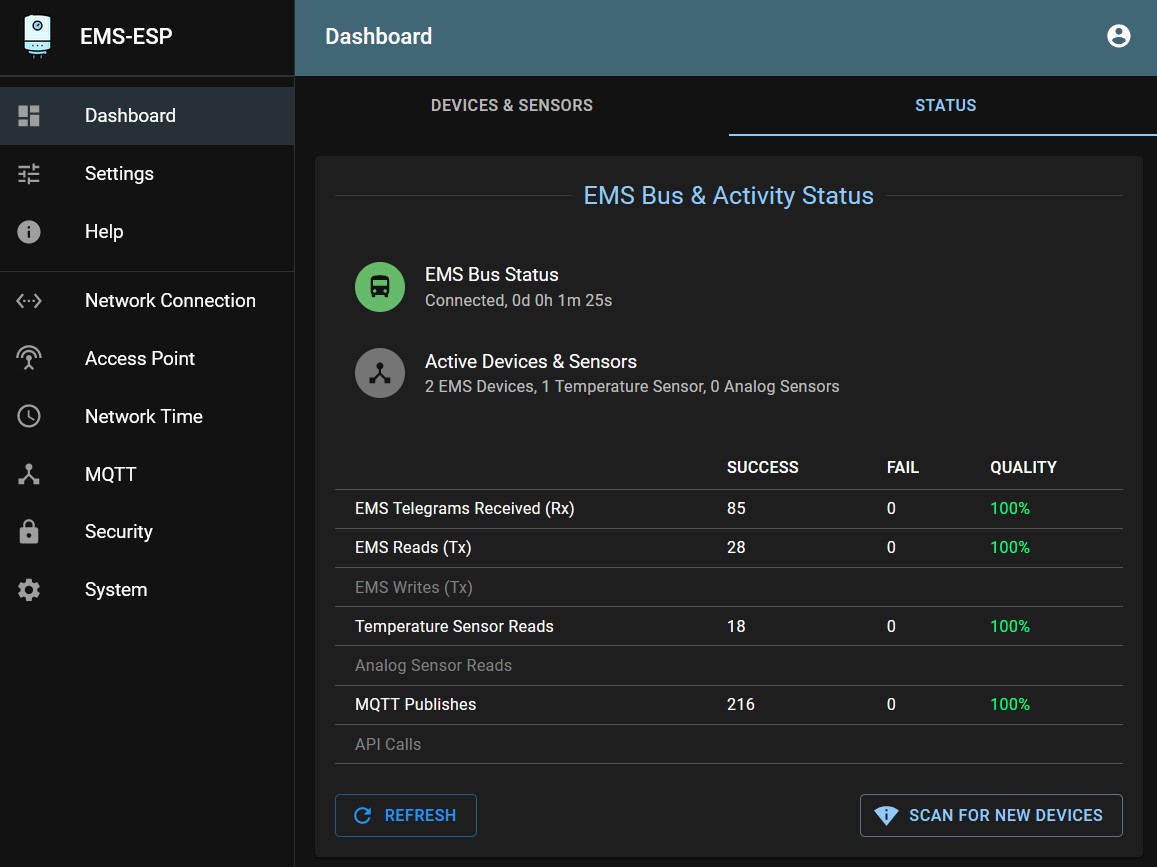
The status tab should show a green icon and saying ‘Connected’. If it’s a red icon try reinserting the cable. If that did not help, just continue with the setup below, you might need to change the TX mode later on.
Making the appropriate settings
There are a lot of setting which are covered in the next chapters, but the first thing you want to do now is to set the Wi-Fi SSID and Wi-Fi password of your own home network. Click on ‘WiFi Connection’ and go to the menu item ‘Scan Networks’.
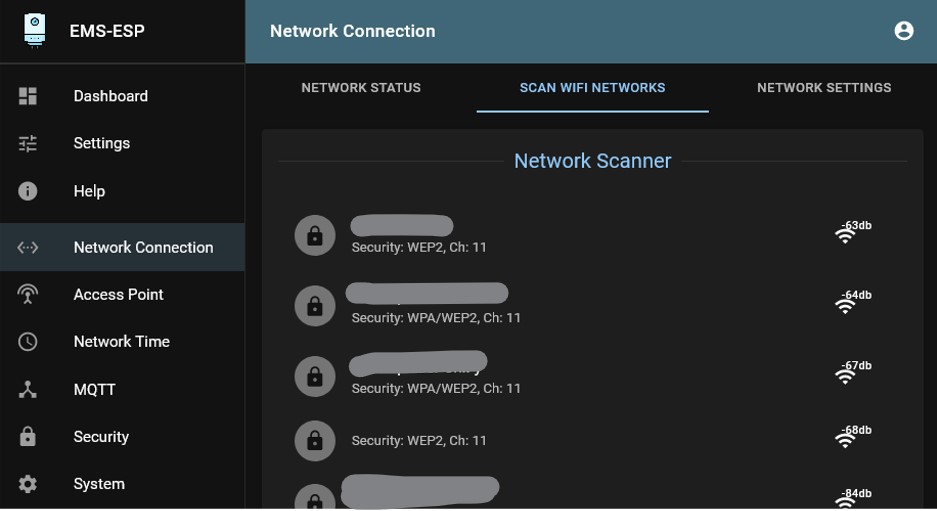
Click on ‘Scan’. You will get a list of all available Wi-Fi networks. Select the correct one or enter the details of your home network yourself. Click on ‘Save’. Now reboot the Gateway by going to ‘System’ and clicking on ‘Reboot System’.
The Gateway will now try to connect to your home network. If successfull, you need to figure out the IP address it got from your home router. If unsuccesfull, the Gateway will return to AP mode after some time.
If you cannot find the right network or you cannot connect to it, make sure it is a 2.4GHz network with WPA2 enabled. If there are no networks found at all, try turning off ad and privacy blockers, theyt may interfere with the web page. Or try another browser.
Note
If you are using a mesh network, it is advised to fix the Gateway to a specific mesh node or access point via the BSSID option. BSSID is the ID of the network node. If you click on a network the BSSID will be filled in. This will prevent some WiFi instabilities that may occur when using a mesh network.
Note
- If you are running a Unifi system (nice); it’s best to create a new WiFi network for the EMS Gateway and other IOT things,
which operates on 2.4GHz-only, with just WPA2 and with all special Unifi features like ‘BSS Transition’ turned off. (You can also add some traffic rules so that the pesky IOT devices are not sending your info to the internet.)
Finding the IP address of the Gateway
Now disconnect from the ems-esp network if you have not already done to and connect to your home network again. Try one of the following host names in the browser to see if you are forwarded to the web interface of the Gateway: http://ems-esp or http://ems-esp.local.
If the request times out, you need to check the router for the Gateway IP address.
Either log in to your router and look up the IP address of the Gateway or use f.i. the app ‘Fing’ on an Android phone to find the Gateway in your network. If you use Fing, the device will show as an ‘Espressif’ device with host name ‘ems-esp’. When you found the IP address of the Gateway you can open a browser and use that IP address to access the web interface.
If you still cannot find the IP address, you can look it up by connecting the USB port of the device to your PC and open a terminal on the serial port. Another method is to unplug the LAN cable, and wait for the ems-esp access point to show up. Log in and go to the access point tab. Set the access point to ‘Always on’. Then plug in the LAN port and check the IP address on the LAN status page.
Setting a fixed IP address
Set a fixed or static IP address for the Gateway in your router. Sometimes this is also called a DHCP reservation. This is necessary later on so that the home automation system will always be able to find the Gateway in your network.
Consult the manual of your router for instructions how to set a static IP address. Although not recommended, it is also possible to set a fixed IP address in the Gateway settings itself.