Configuration for Domoticz
At this moment (December 2021) there are two ways to get all the devices into Domoticz. You can use MQTT Autodiscovery or you can use the Python plugin.
With MQTT Autodiscovery you get ALL parameters into Domoticz with the native ‘MQTT Client Gateway with LAN interface’ hardware module. Alternatively you can use the Domoticz python plugin (not recommended).
MQTT Autodiscovery
Although still in beta, Home Assistant MQTT Autodiscovery has been implemented in Domoticz as well. As the Gateway already supports this feature, it is very easy to get ALL parameters into Domoticz within minutes.
Domoticz version
You need to run a recent beta version of Domoticz. Any version from late december 2021 onwards will do. Some additional finetuning for the discovery protocol has been done in Domoticz build 13949. So that build or later will work fine.
Turning on Autodiscovery
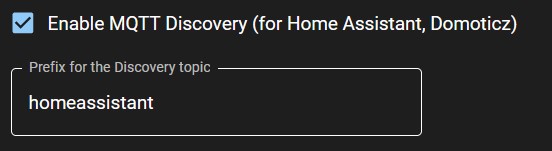
Open the web interface of the Gateway. Go to MQTT Settings. Mark the checkbox at ‘Use Home Assistant MQTT Discovery’. You can change the topic prefix to ‘ domoticz’ as well. Restart the Gateway.
Next go you your Domoticz dashboard.
Adding the hardware in Domoticz
The great thing about MQTT auto discovery is that this is a new native feature built into Domoticz. So aside from Mosquitto, you do not need to install software or another plugin.
In the Domoticz dashboard go to Settings -> Hardware.
And add a new hardware of the type ‘MQTT Auto Discovery Client Gateway with LAN interface’. If you already have one of these active, you still need to create a new one for the Gateway. Give it a name. F.i. ‘EMS Gateway’.
You need to set the remote address, which is the IP address of the machine that runs your MQTT broker (likely Mosquitto). Usually Mosquitto runs on the same machine as Domoticz. The port number is almost always 1883.
Optionally you can set the username and pasword if you configured Mosquitto that way.
At ‘Auto Discovery Prefix’ fill in ‘homeassistant’ or ‘ domoticz’ (Whatever you used on the EMS-ESP settings page). Leave the rest as it is.
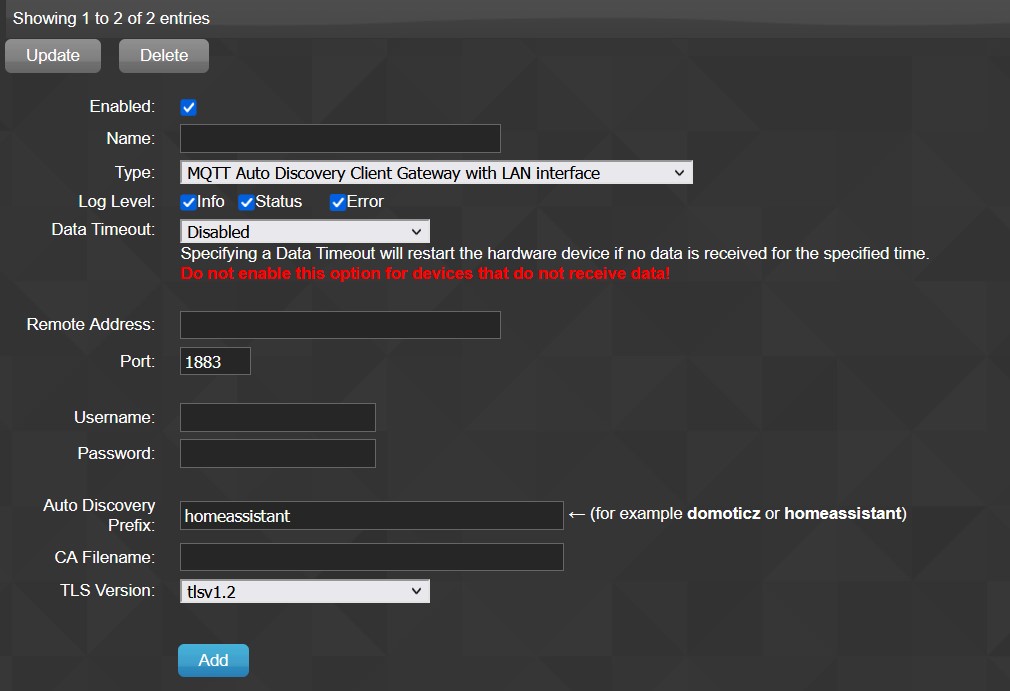
Now click on ‘Add’.
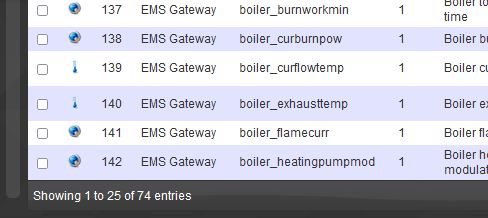
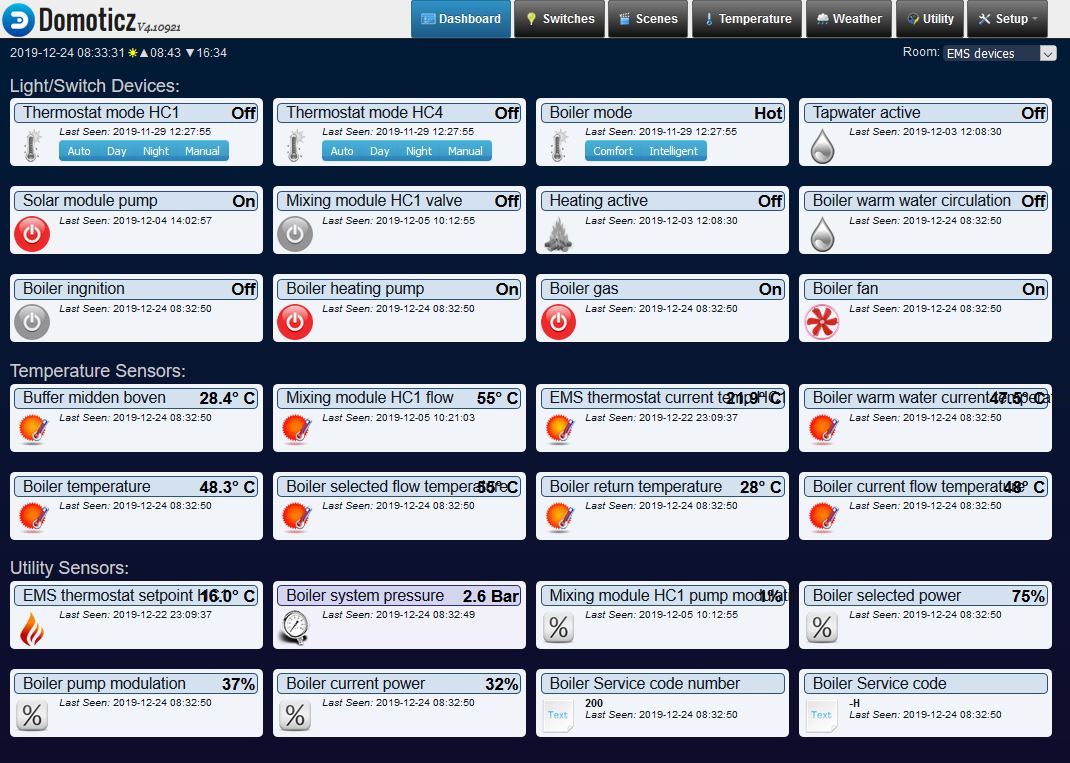
Wait a minute or two so Domoticz can process all MQTT discovery topics the Gateway sends out. For each parameter in the Gateway you get a device in Domoticz. A simple boiler and thermostat will give you about 75 parameters.
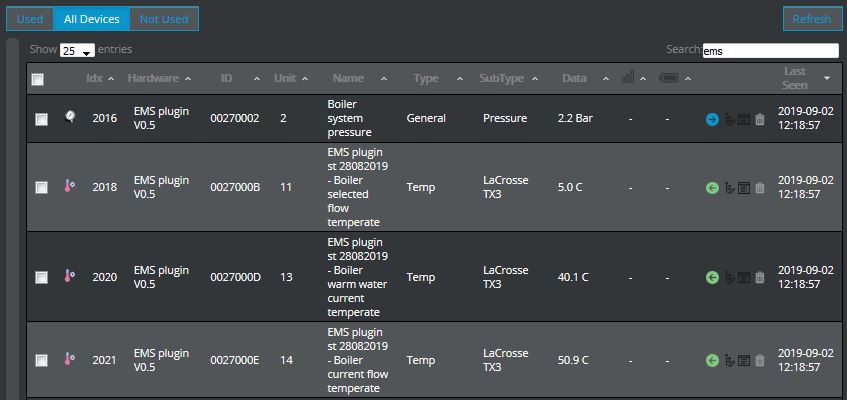
If you go to Setup -> Devices and filter on the hardware you just created you get a long list of devices. If you see this list then the discovery was successful.
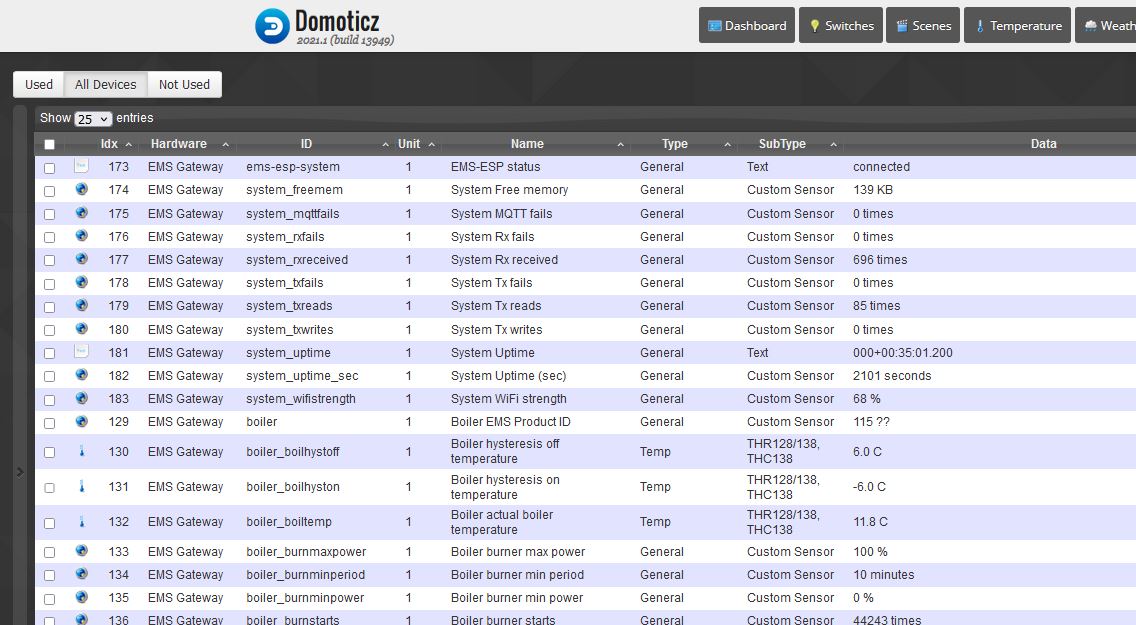
You can see the amount of devices that were created at the bottom of the list.
Note
MQTT Discovery for Domoticz is still in beta. So features may be added later on and some bugs may still be present.
Help I don’t see any device
If the Device list in Domoticz is not filled now, something went wrong.
Make sure Mosquitto is running, that MQTT Discovery is turned on in the Gateway and that you entered the right IP address and credentials.
You can use a program called MQTT Explorer 1 to check for issues. Connect to your broker and you should see topics called ‘ems-esp’ and ‘homeassistant’. If you don’t see topics starting with ‘homeassistant’ then you did not turn on MQTT Discovery in the Gateway correctly. Please do so and restart the Gateway.
You should see something like below:

If you get devices into Domoticz, but not as they should, then you might need to delete the whole homeassistant tree in MQTT Explorer. Then restart the Gateway and it will re-populate these topics.
Domoticz plugin
This section below is for the old plugin. If you are a new Gateway owner, do not follow the section below but use the Autodiscovery feature.
To use the Gateway with Domoticz you can install a plugin.
Note
There are so many ongoing changes, its very hard to keep the Domoticz plugin in sync with EMS-ESP32. So there is often a lag in parameters. Also the Domoticz Python plugin framework does not handle plugins with lots of devices very well. Usign the Autodiscovery above yields much better results.
First check the ‘configuring MQTT’ page to make sure everything is ready.
Installing the plugin
To install the plugin, open a terminal to your Domoticz system. You can use f.i. Putty 2.
If you have Git installed (preferred method):
Go to the domoticz/plugins directory and run
git clone https://github.com/bbqkees/ems-esp-domoticz-plugin.git
Tip
Use the dev-multi2 branch instead of the main branch.
git clone -b dev-multi2 https://github.com/bbqkees/ems-esp-domoticz-plugin.git
Or as an alternative you can do the following (not recommended): Create a new directory ‘ems-gateway’ in the folder domoticz/plugins. Copy the files mqtt.py and plugin.py to this new domoticz/plugins/ems-gateway directory.
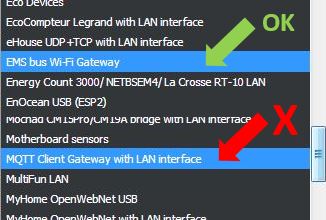
Make sure that ‘Accept new Hardware Devices’ is enabled in settings/system. Now start the domoticz service (by typing sudo systemctl start domoticz in the shell). Create a new hardware of the type “EMS bus Wi-Fi Gateway”. (Do not create a hardware of the type ‘MQTT Client Gateway’, this is something different). See the image below.
Configuring the plugin
Set the MQTT server and port
Usually the MQTT server is running on the same machine as Domoticz. If so, you can leave the IP and port to its default setting.

Optionally you can set a username and password here. By default this is empty.
Setting the correct topics
The plugin listens to the topics preceded by “ems-esp/”. Don’t forget that / at the end.
Also make sure you don’t change the host name of the Gateway otherwise the topic will change as well! In the latest plugin version you can change the topic string to your own preference.
Setting MQTT format
You need to set the MQTT format to ‘nested on a single topic’ otherwise the plugin won’t work properly.
Dallas sensors
If you want to add Dallas sensors, go to Settings and set ‘Dallas Sensor Format’ to ‘by number’. Otherwise the plugin cannot recognize the sensors from the MQTT payload.
Using the plugin
The plugin subscribes and publishes to the default MQTT topics of the Gateway. On the first run the plugin will create several devices and sensors in Domoticz, depending on which parameters it found.
The plugin captures the messages and updates the Domoticz devices and sensors automatically. Go to the ‘Devices’ tab in Domoticz and search for the devices that are created. You can now add each device to Domoticz by clicking on the small green arrow with ‘Add Device’.
You can do this for all parameters you find interesting.
Heating circuits
The EMS bus supports 4 heating circuit (HC1 to HC4). Depending on your setup one or more heating circuits may be used. It is not always clear which heating circuits are in use. If you have a Nefit boiler with a single thermostat, the heating circuit used will almost always be 1. If you have a f.i. a Buderus boiler with a RC35 thermost, it might be that circuit 2 and 4 are used.
The plugin will only create thermostat devices in Domoticz for heating circuits it detected. You can figure out which one is used by adding all of them and changing the thermostat temperature and see which thermostat device in Domoticz changes.
Counters
In the latest (development) version of the plugin several counters were added like burner starts and UBA uptime. Be default, Domoticz might set these counters as kWh meters. When you have added these devices in Domoticz and the format is incorrect, you have to edit each device and set it to ‘type’ ‘counter’. For the counters that add up time set the ‘Value Units’ to ‘min’.
Updating the plugin
To update the plugin, stop the Domoticz service (by typing sudo systemctl stop domoticz in the shell). Then copy the new plugin.py file to the plugin folder and overwrite the existing file. Or if you used the ‘git clone’ command to initially install the plugin just navigate to the plugin folder and type:
git pull
Now restart the domoticz service:
sudo systemctl restart domoticz
On first run of the plugin (takes a minute maybe) additional devices will be created automatically if they were not defined before. Existing devices will not change.
More info
For more details please consult EMS-ESP Domoticz plugin repository 3.