Connecting the Gateway to your home network
After you connected the Gateway to your boiler and the LED blinks slowly, you need to integrate the Gateway into your home network. To setup the Gateway you need a laptop or other computer with a web browser.
Note
If you have a Premium II and the thermostat now gives an error like A01 or A05, or the KM200 interface does not respond anymore, just continue with the setup. If you completed the setup and added the Gateway to your WiFi and home automation most errors will go away.
If they don’t go away after a while, then you need to power the Gateway via USB (or an external adapter).
Accessing the web interface of the Gateway
You need to change several setting in the web interface of the Gateway for it to connect to your home network. In order to do so, you need to access the web interface.
Item |
Default value |
|---|---|
Wi-Fi network name |
ems-esp |
Wi-Fi network password |
ems-esp-neo |
Default user |
admin |
User password |
admin |
When you get it delivered, the Gateway is in its factory condition. At boot the Gateway will create a wifi network called ‘ems-esp’ and the default password is ‘ems-esp-neo’.
Connect to this network with a laptop. (Keep in mind as soon as you are connected to the ems-esp network, you cannot access the internet with the laptop.) Open a web browser and go to IP address 192.168.4.1 (or try the host name ‘ems-esp’).
You will be asked for a password. The default password is ‘admin’.
You will now see a screen that resembles the following one:
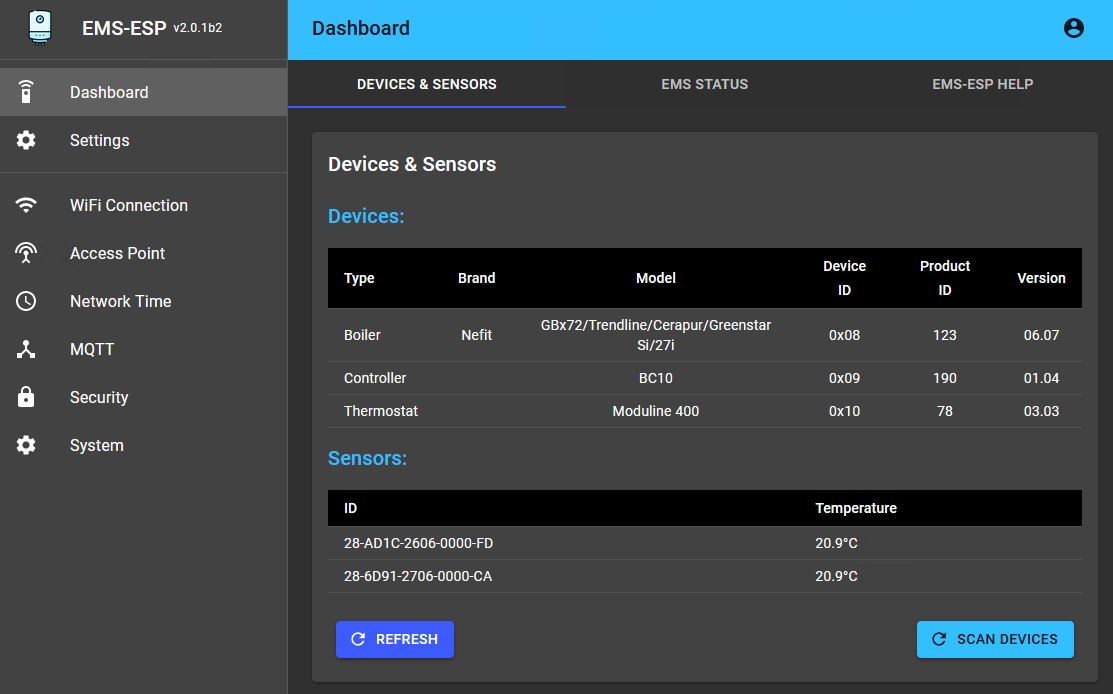
The main dashboard will give you an overview of what the Gateway has detected on the bus. If it has found a boiler, a thermostat and/or a mixer module it will show its main parameters.
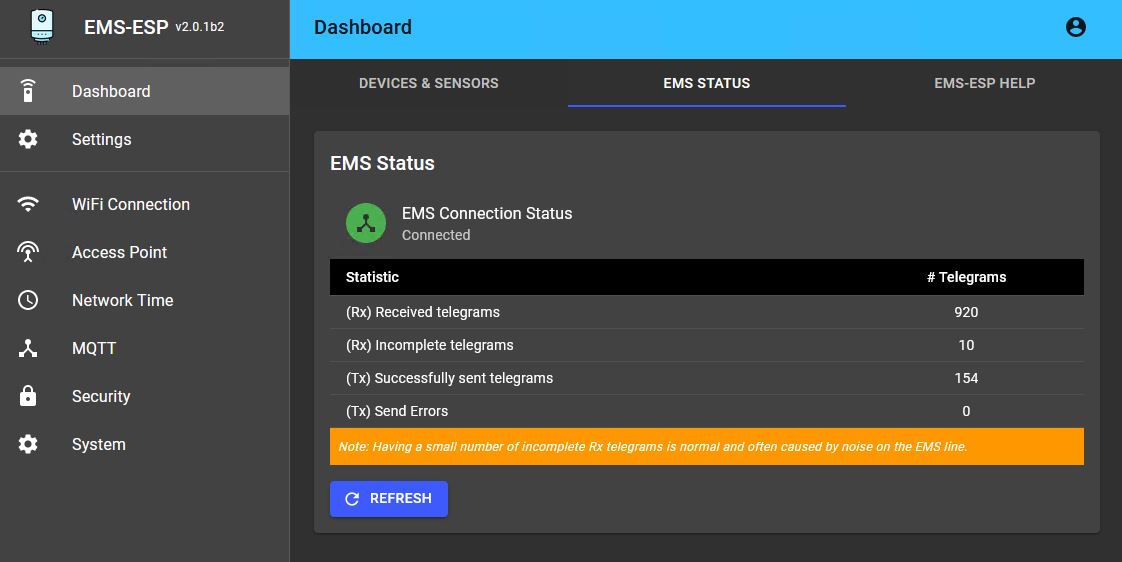
The status tab should show a green icon and saying ‘Connected’. If it’s a red icon and its says ‘EMS bus connected but TX not active’ try reinserting the cable. If that did not help, just continue with the setup below, you might need to change the TX mode later on.
Making the appropriate settings
There are a lot of setting which are covered in the next chapters, but the first thing you want to do now is to set the Wi-Fi SSID and Wi-Fi password of your own home network. Click on ‘WiFi Connection’ and go to the menu item ‘Scan Networks’.
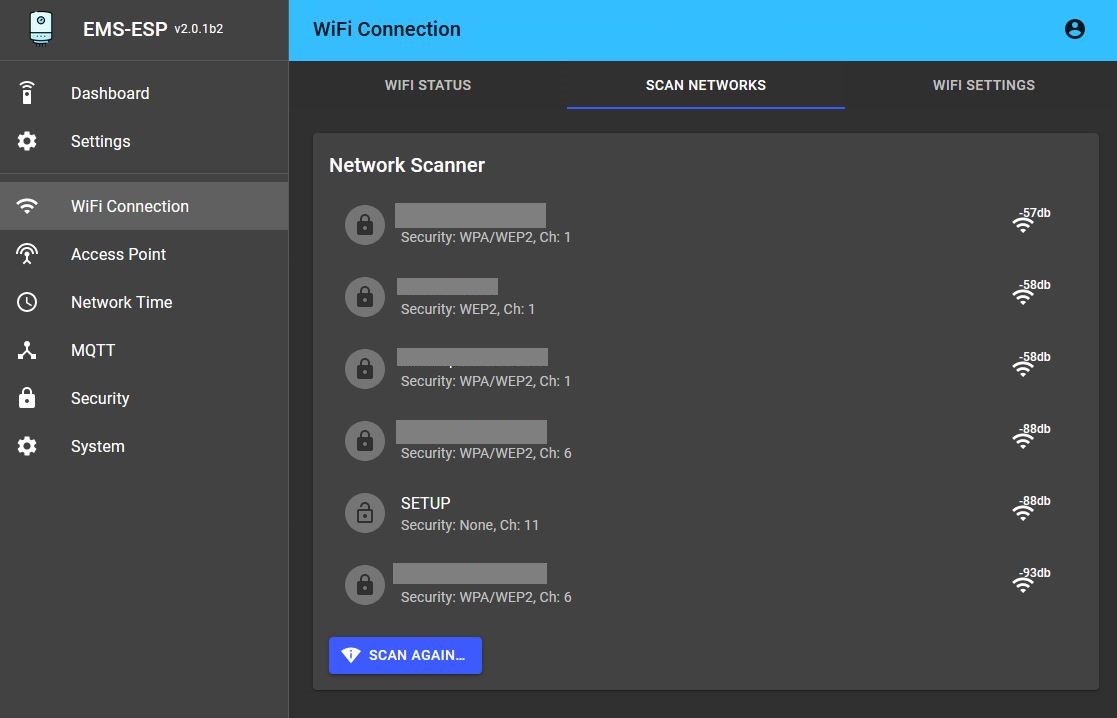
Click on ‘Scan’. You will get a list of all available Wi-Fi networks. Select the correct one or enter the details of your home network yourself. Click on ‘Save’. Now reboot the Gateway by going to ‘System’ and clicking on ‘Reboot System’.
The Gateway will now try to connect to your home network. If successfull, you need to figure out the IP address it got from your home router. If unsuccesfull, the Gateway will return to AP mode after some time.
Finding the IP address of the Gateway
Now disconnect from the ems-esp network if you have not already done to and connect to your home network again.
Either log in to your router and look up the IP address of the Gateway or use f.i. the app ‘Fing’ on an Android phone to find the Gateway in your network. If you use Fing, the device will show as an ‘Espressif’ device with host name ‘ems-esp’. When you found the IP address of the Gateway you can open a browser and use that IP address to access the web interface.
Setting a fixed IP address
Set a fixed or static IP address for the Gateway in your router. Sometimes this is also called a DHCP reservation. This is necessary later on so that the home automation system will always be able to find the Gateway in your network.
Consult the manual of your router for instructions how to set a static IP address. Although not recommended, it is also possible to set a fixed IP address in the Gateway settings itself.
Note
Setting TX delay for Buderus Web KM200/KM100/KM50/MB LANN 2 or boilers with ethernet: If you have a Bosch/Buderus Web gateway Ethernet module like the KM200, KM100, KM50 or your boiler has one built in, you need to go to Settings and then set ‘TX delayed start’ to 60 seconds.