

Description
Currently we only sell this Gateway in the KIT version with all options/accessories. Please look HERE.
The Gateway E32 V2 (Ethernet + WiFi Edition V2) is the most feature-rich BBQKees EMS Gateway, suitable for both WiFi and LAN networks.
Just plug in the Gateway into the EMS service jack on the boiler or inside the heat pump with the EMS service cable and stick it to the side of the boiler.
No additional cables are needed and everything is powered from the EMS service jack itself.
If your boiler does not have an EMS service jack or you want to mount the EMS Gateway elsewhere, you can also connect the EMS Gateway in parallel to the thermostat/EMS bus on the EMS screw terminal inside the boiler or heat pump. In this case the EMS Gateway needs to be powered from the optional external 12V power adapter.
The Gateway connects directly via your home network to your home automation like Home Assistant.
No cloud, internet service or external accounts needed. No subscriptions, nothing. All your heating data is yours only.
Some key specs:
- ABS enclosure with mounting holes for easy wall mounting
- All connectors on one side
- Circuit board with integrated ESP32 module with future proof 8MB* PSRAM and 16MB Flash
- Robust and proven BBQKees EMS bus circuit compatible with all EMS devices
- Features both LAN and WiFi for wired and wireless networking
- 2.4GHz WiFi (can be turned off when using LAN or vice versa)
- Reliable 100Mbit Ethernet LAN port for maximum network stability
- Firmware upgrade via the webinterface or USB-C
- Configured for Home Assistant, HA will automatically detect all entities
- Supports the Home Assistant MQTT Discovery protocol
- MQTT Discovery also works with Domoticz and OpenHAB without plugin
- MQTT and Restful API for other interfaces like NodeRED and Loxone
- Telnet console, admin and guest users
- ModBus TCP (Support depends on the specific heat source)
- Optional external DS18B20 temperature sensors
- Powered by EMS service jack or 12V DC power supply
- Connect to the EMS bus via service jack or screw terminal
- Pre-loaded with EMS-ESP firmware 3.7.3 and higher
- Supports all EMS heating circuits
- Support large EMS systems with many EMS devices simultaneously
- Support for EMS, EMS+, Heatronic 3 etc.
- CE certified product (also valid for the UK)
- New: internal Gateway temperature sensor (DS18B20U)
- New: Voltage monitors for Gateway input and 3.3V rail
- New: RGB status LED instead of blue LED.
Some recent firmware features (available on all recent EMS Gateways):
- Set virtual remote thermostats for RC30/RC35, RC300/RC310/BC400 main thermostats
- Virtually set the SmartGrid (SG) and PhotoVoltaic (PV) inputs of heat pumps
- Calculate gas/energy consumption in kWh for heating and hot water of all boilers
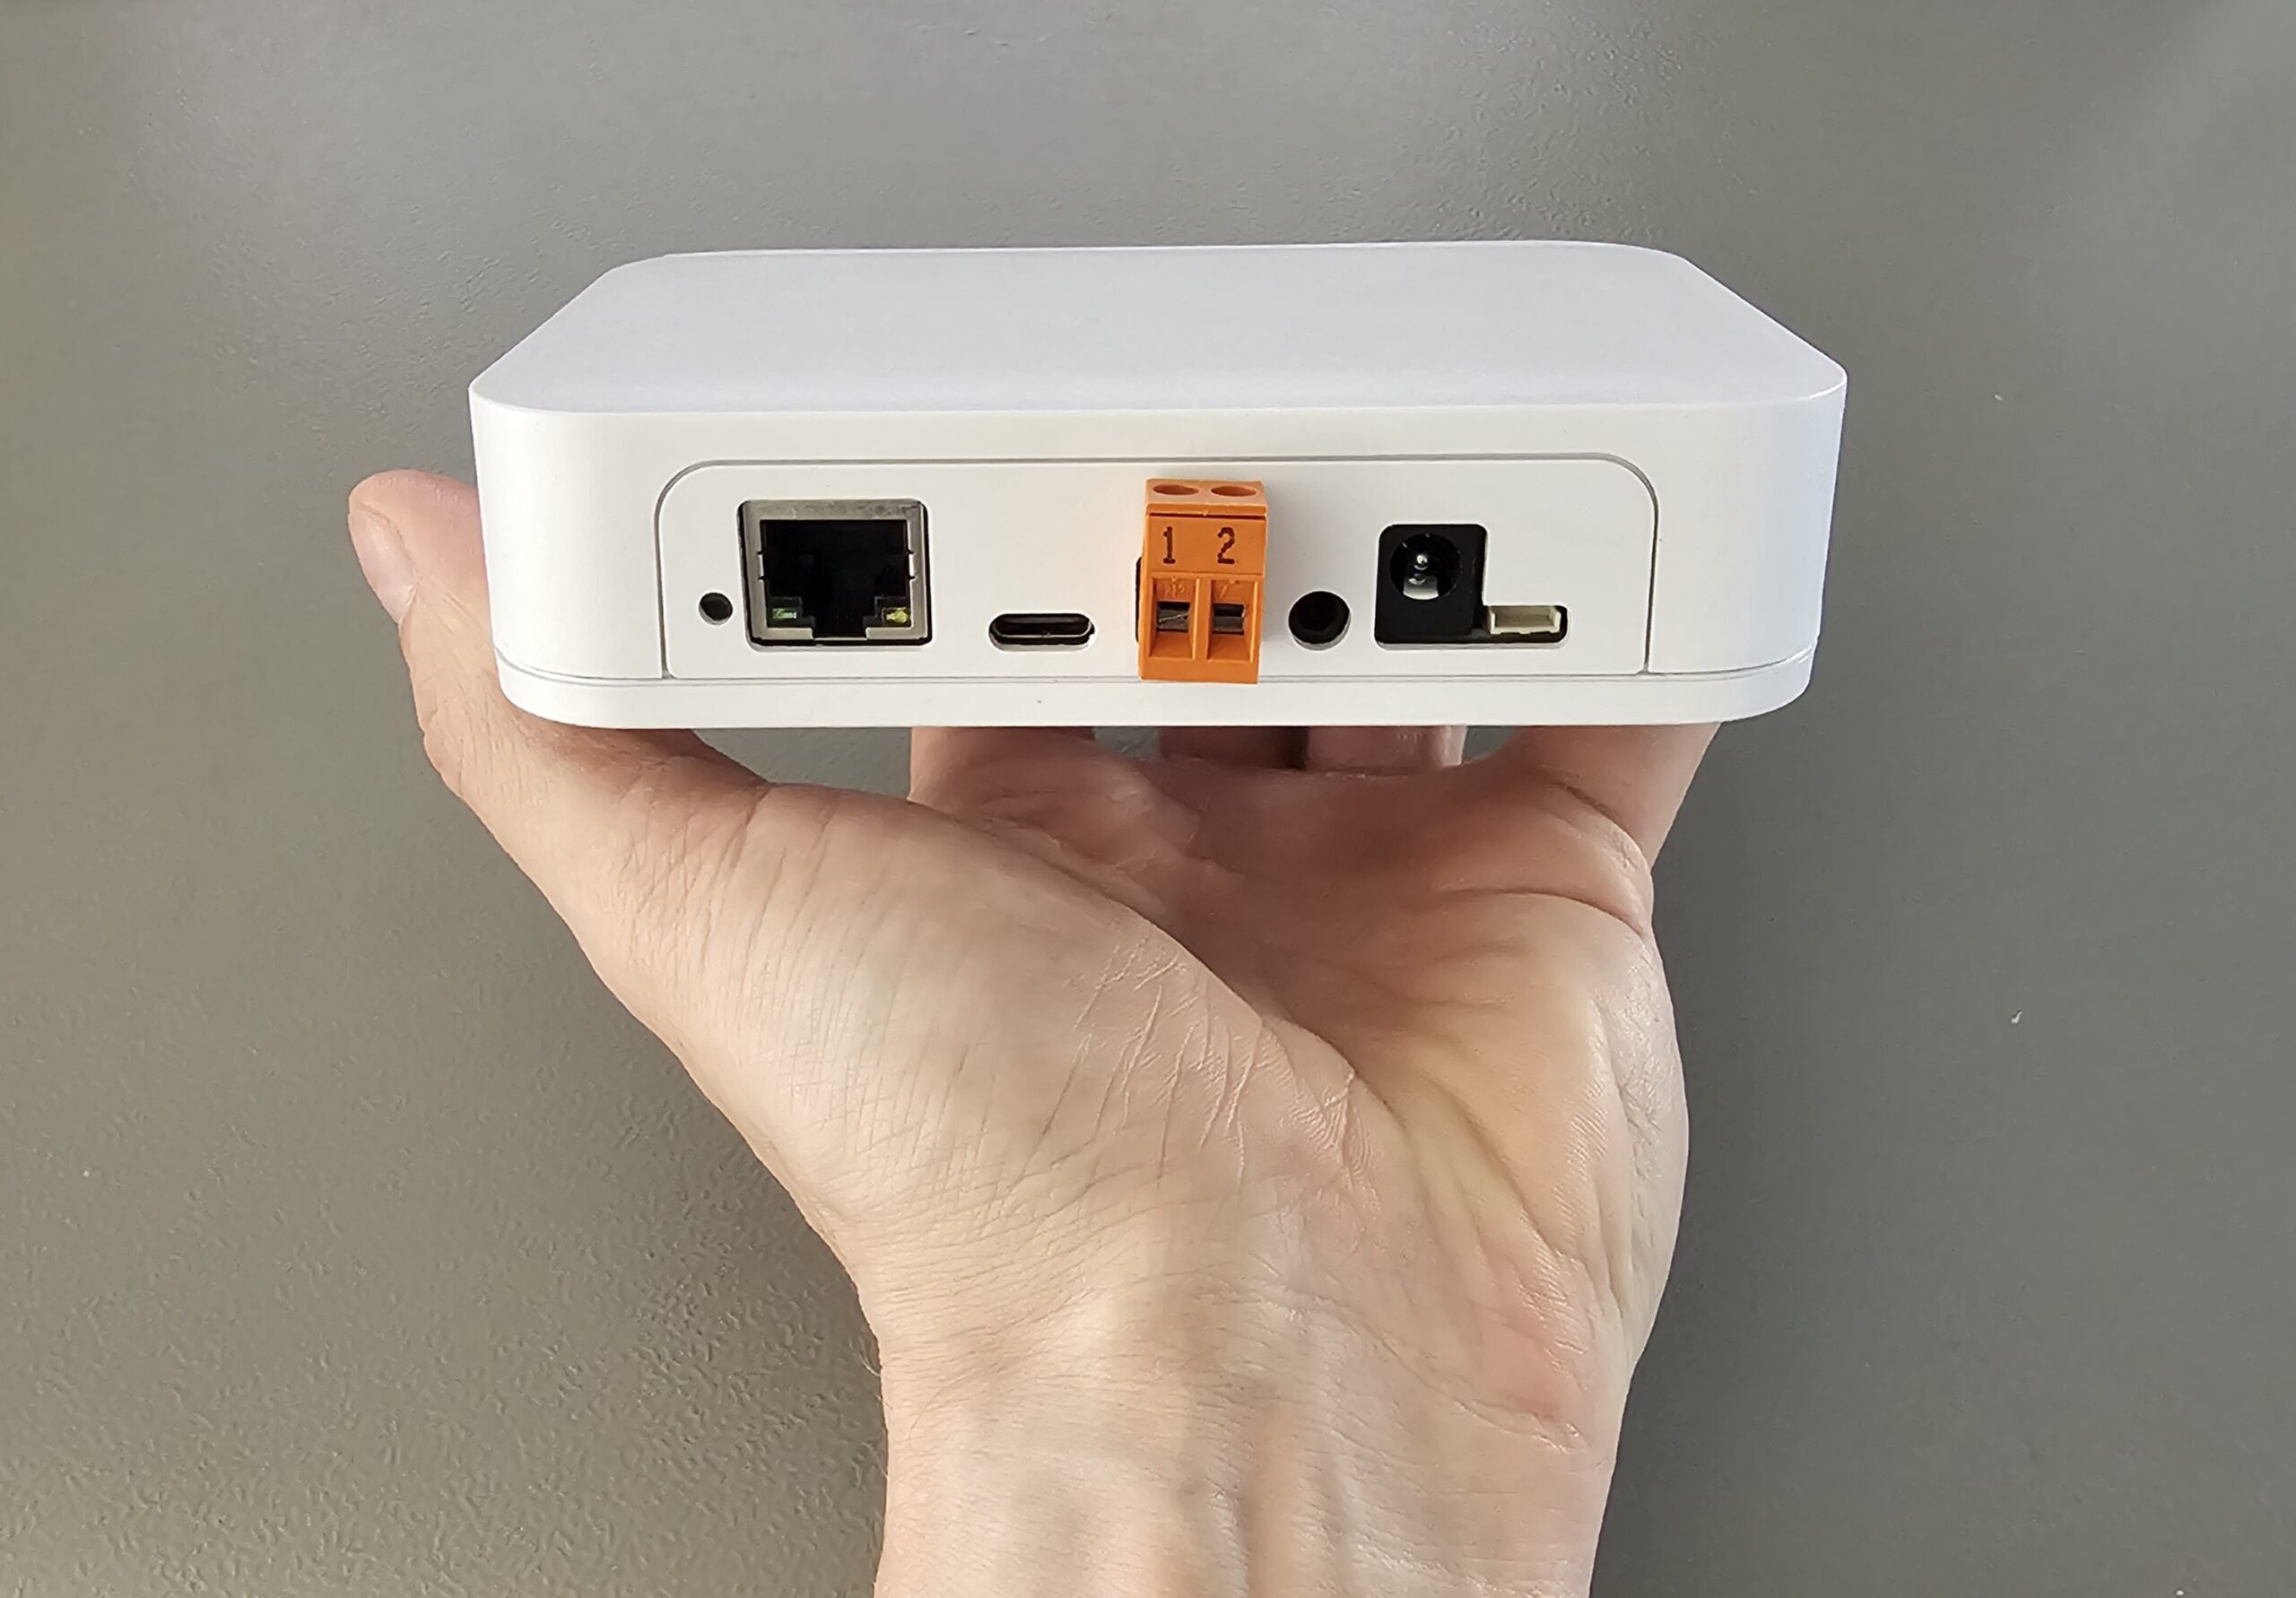
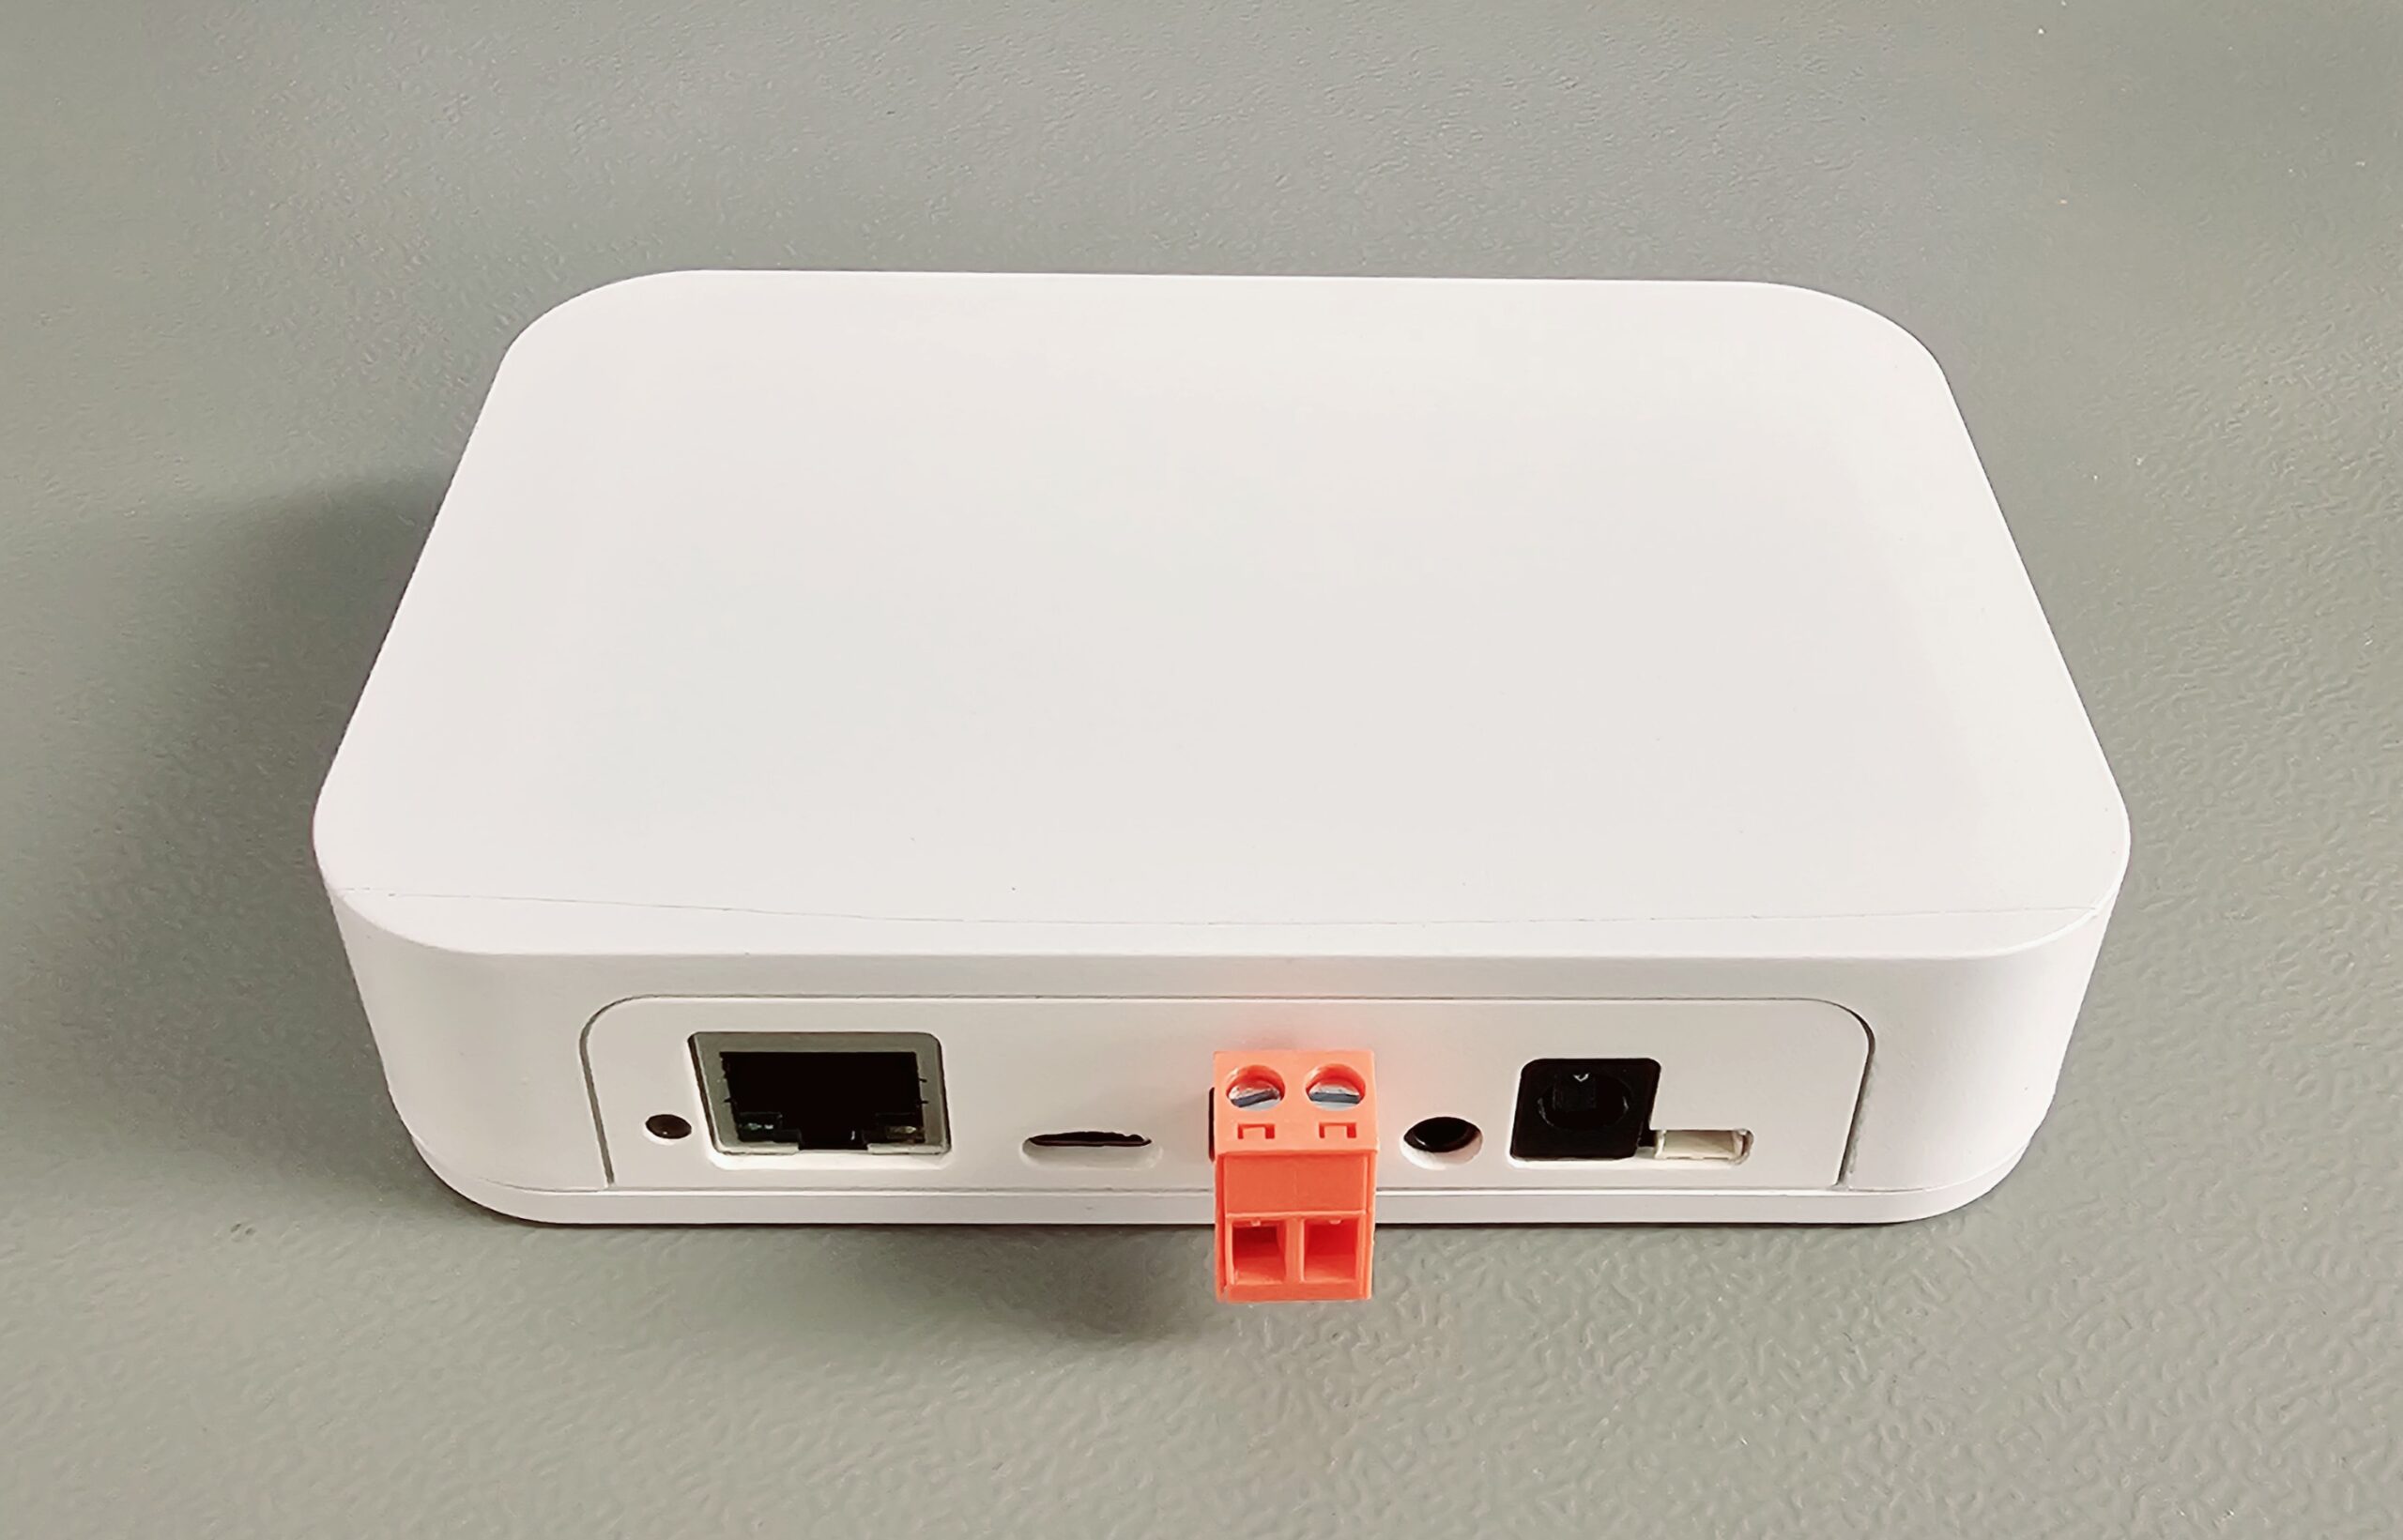
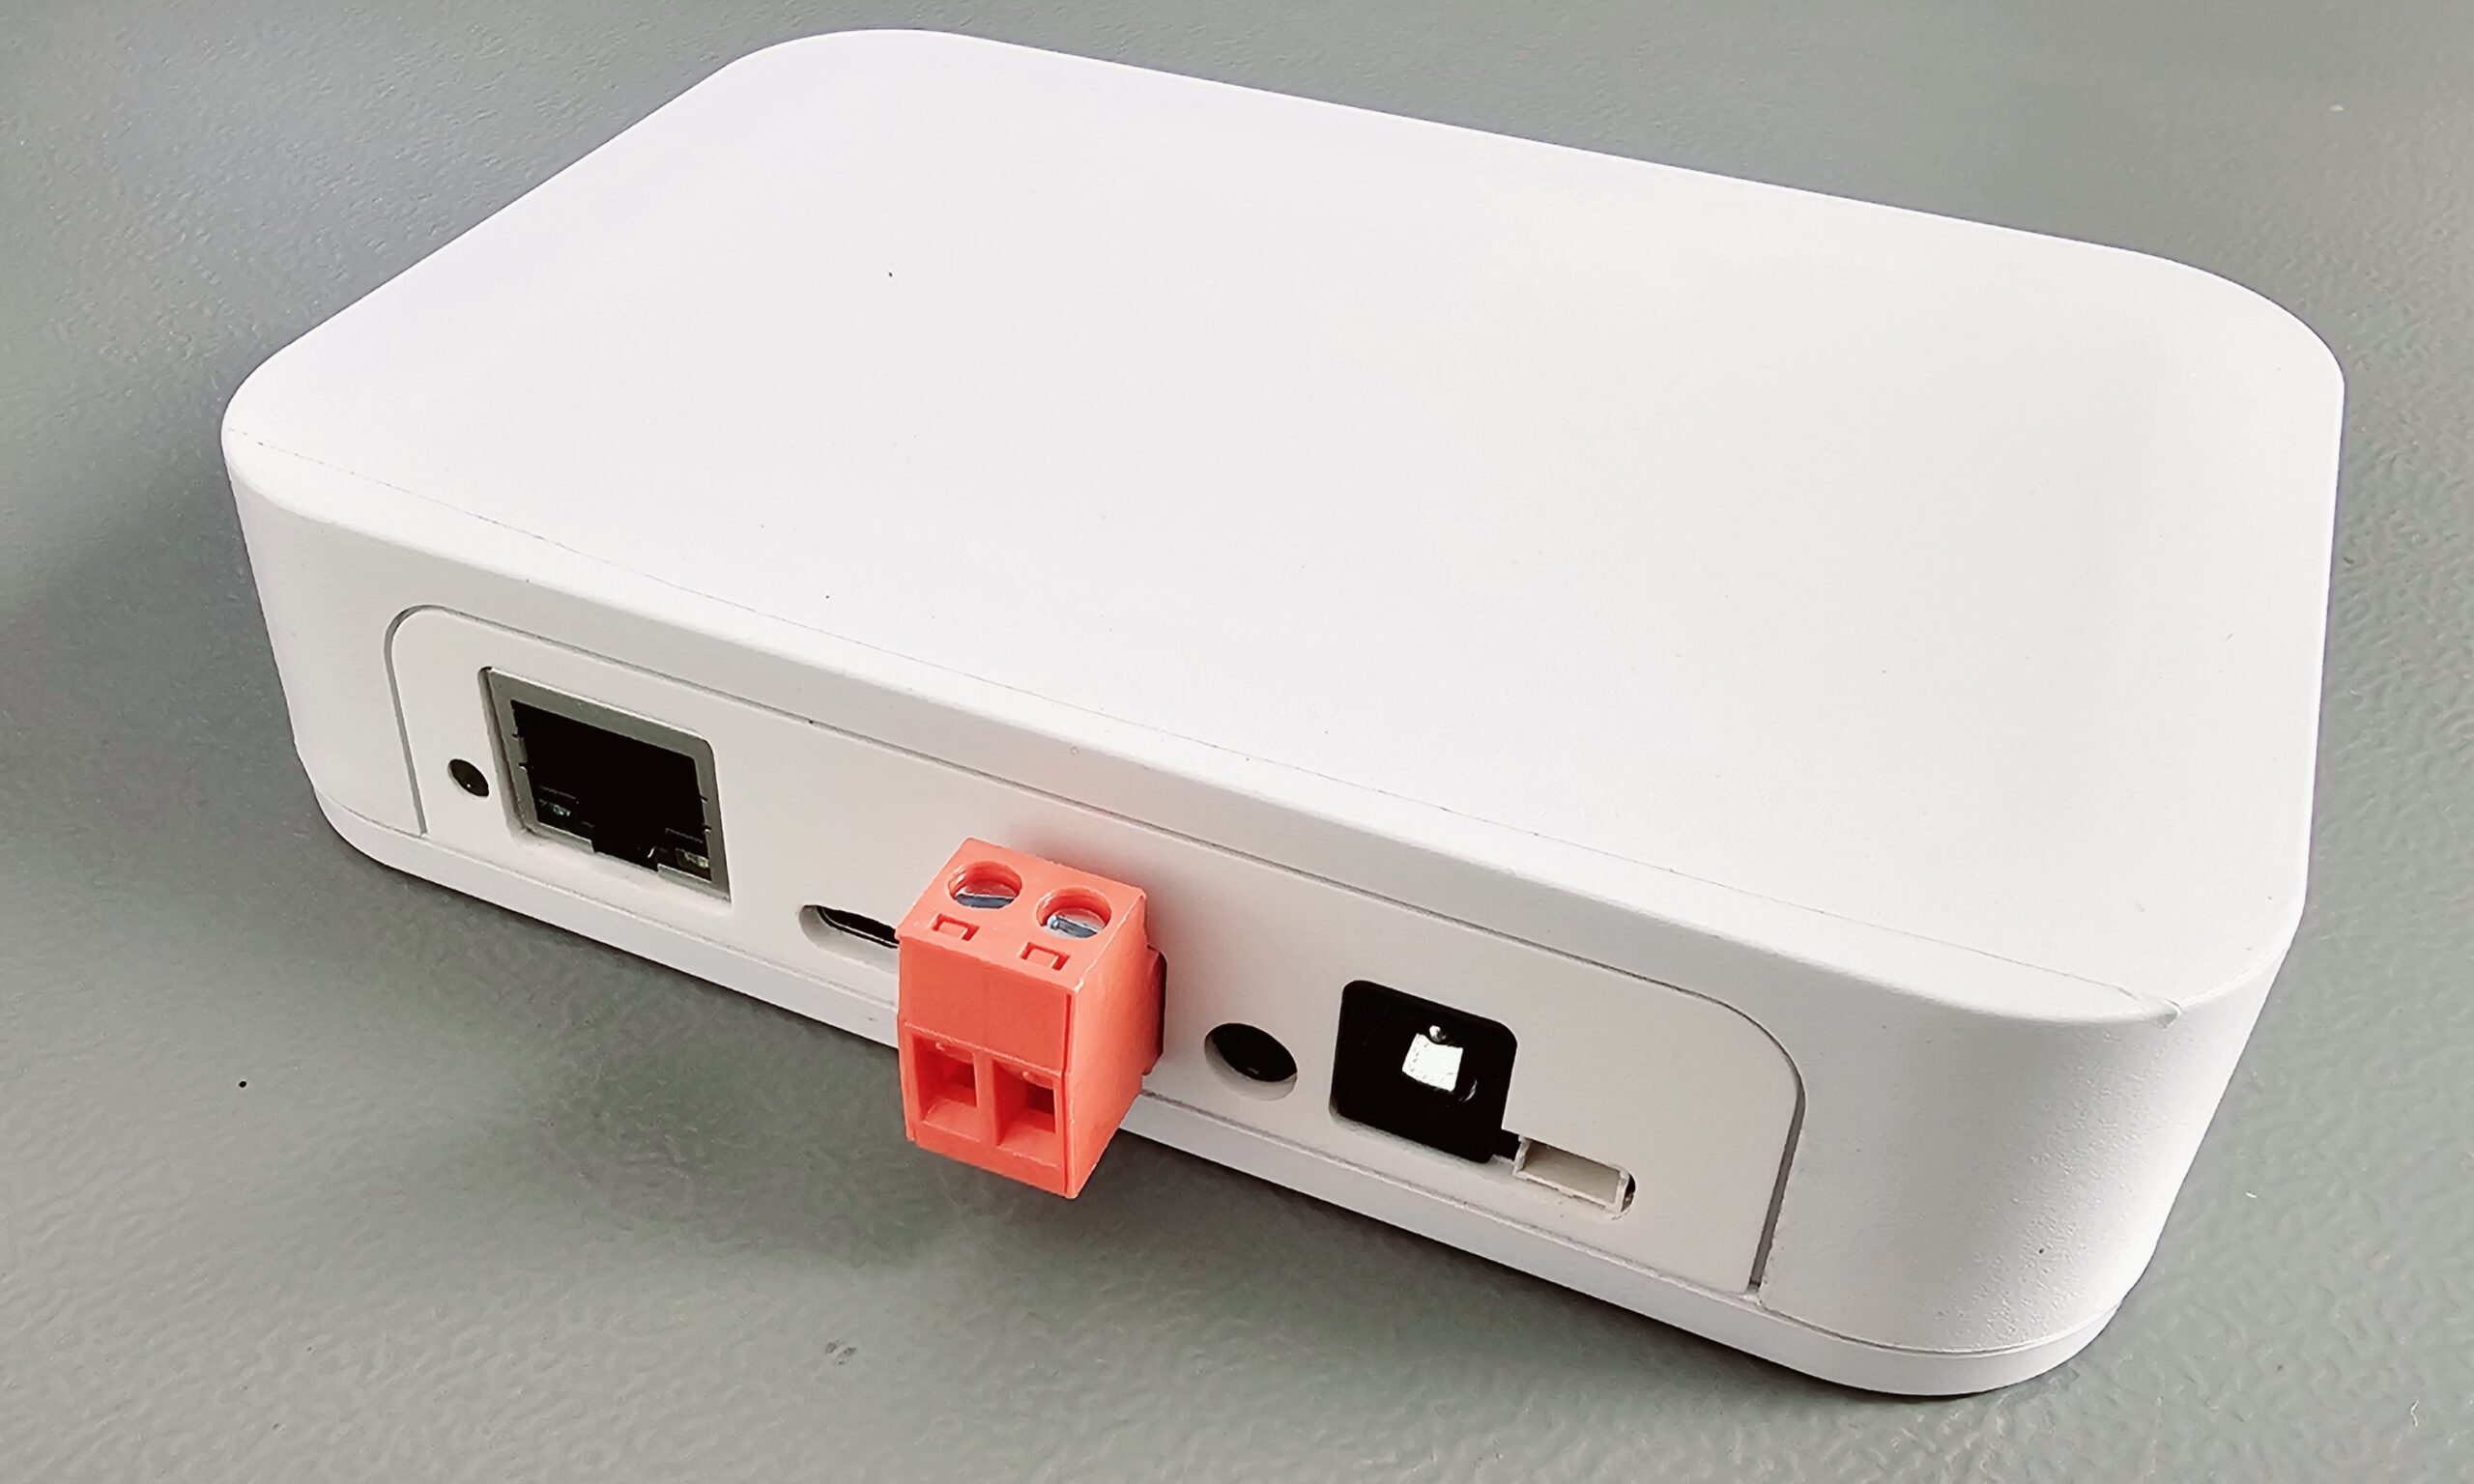
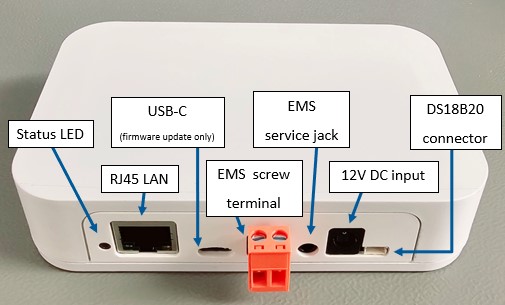
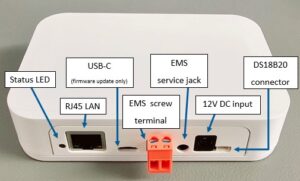
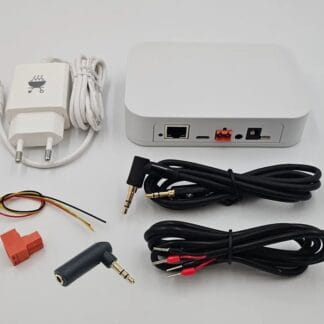
In the image below a description of all outward facing connectors.
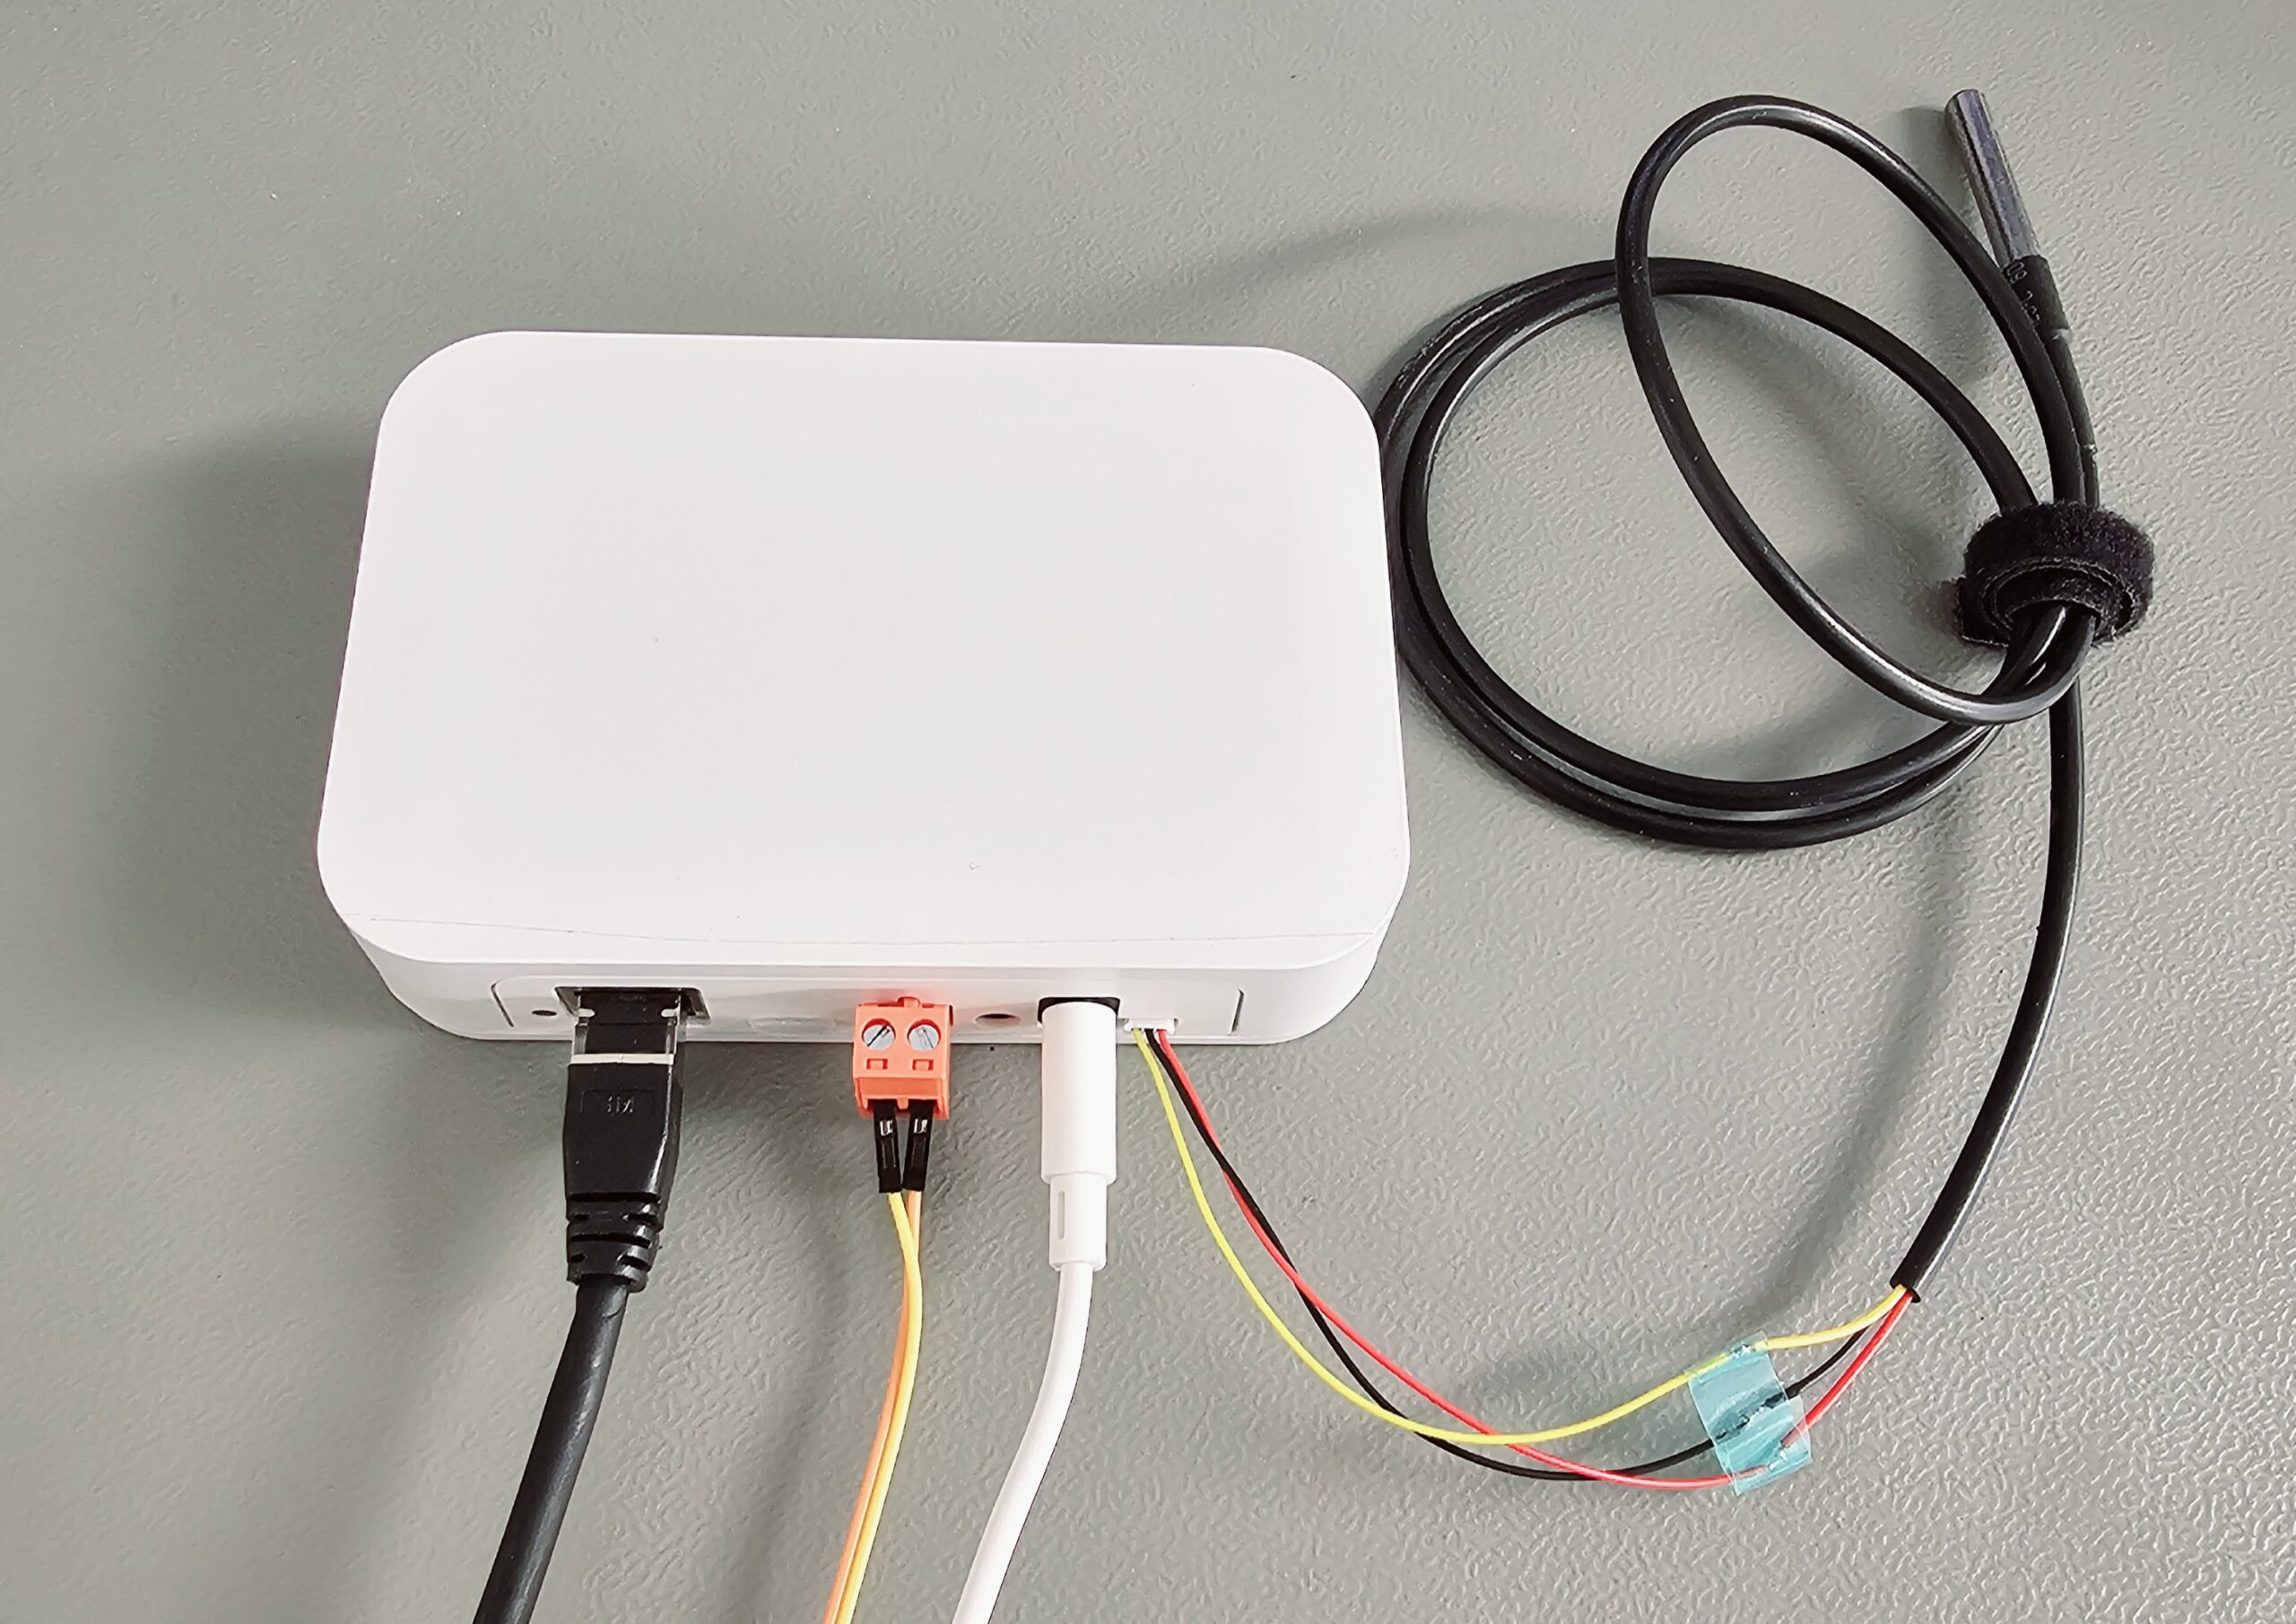
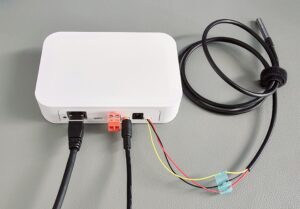
Below an example configuration with LAN cable, EMS bus via the EMS service cable (and an additional DS18B20 sensor).
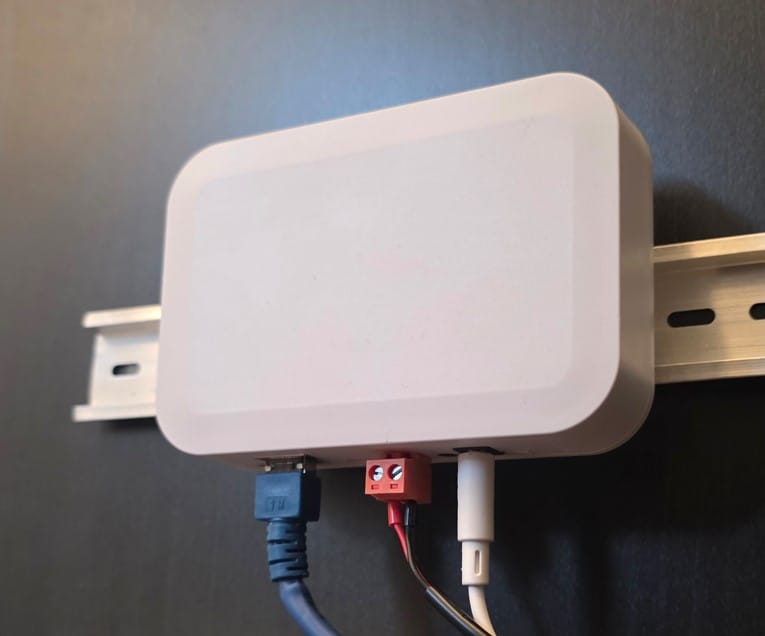
And here the alternative connection of the EMS bus via the orange screw terminal and a 12V DC power supply.

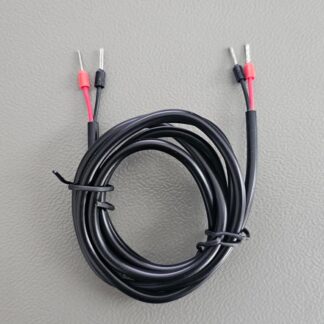
You get all of this with the ‘KIT version’. 1 Includes a 110cm EMS service cable, the 12V DC (0r 5V USB-C) power supply and the 100cm screw terminal cable combined for a reduced price.
With these 3 options together you can connect any Gateway in every cabling situation.
Downloads:
EU Declaration of Conformity E32 V2
* The hardware already has 8MB PSRAM, the firmware currently supports 4MB PSRAM.
In a future firmware update more can be enabled if needed.
Does not work with OpenTherm or iRT boilers like the Nefit Proline NxT (normal Proline is OK), Nefit Ecomline, Buderus U104, U112, U114, U122, U124, GB112, GB122, Linea Kombi 23. These do not have an EMS bus. Please check before ordering on the EMS device compatibility page.


Michel M. (verified owner) –
Le boitier est bien fini, les connecteurs tiennent bien en place. L’ensemble fait très professionnel. Le boitier n’est pas livré avec une alimentation externe ou de son câble EMS. Ces deux articles sont à commander séparément. Prévoir +/- 11€ en plus pour ces deux articles.
Installé et configuré en moins de 30 minutes, hors montage mural, sous HomeAssistant.
Montage:
J’ai connecté le boîtier au routeur avec un câble réseau RJ45 (câble noir sur la photo). La connexion à la chaudière BUDERUS (gaz) se fait sur le même connecteur EMS que celui utilisé par le thermostat RC310 au moyen d’un câble électrique souple de 2 x 1,5mm² (câble blanc sur la photo).
Anonymous (verified owner) –
Anonymous (verified owner) –
Matthias Vering (verified owner) –
Libor Krupička (verified owner) –
I am excited, for example the total kwh function will replace the gas meter sensor in HA, because I only have one gas appliance (GB072). On the second page, I am looking for an explanation and use of the functions of my boiler, for example, One time charging – what are the conditions for turning it on. I have the dhw gas heating off (I have an electric coil) but I would run the gas heating or dhw Disinfecting once in a while. I am looking for practical examples of the use of functions and features of ems-esp.
Wouter s. (verified owner) –
very interesting device, gives you insights in everything that is happening in your boiler and thermostat. seamless integration into home assistant.
the ethernet connection gives me ease of mind and getting it powered by your boiler is smart.
now i have integrated a thermostat schedule by home assistant, as well as geofencing, turning temperature to standby when no one is home.
this is the way to turn your ‘old’ (mine is from 2004) nefit boiler into a relevant and up to date one. the alternative is a nefit easy, but the price, man… and cloud based, no internet no heating!
i prefer this one with a home assistant, everything local and in your own control.
Paul (verified owner) –
I bought the E32 v2 gateway to monitor my Worcester-Bosch Greenstar 4000 15Kw system boiler through Home Assistant and try to put a heating automation plan I had into action (more on that in a moment). In summary, the product has exceeded all expectations, money well spent! The initial setup took only 5 minutes using the boiler service jack and CAT5. In no time I had close to 70 boiler entities reported to Home Assistant via MQTT. My boiler is fitted with an add-on outdoor weather sensor which surfaces 6 additional weather compensation related entities. These were not initially recognised by the default E32 v2 firmware but the BBQKees Electronics developers were immediately on hand to get them added. Using the E32’s web management interface I provided a syslog trace from which they identified the new features and helped me create some custom entities. Everything worked immediately. Within days they also provided a new updated beta firmware which i’ve now switched over to. The outcome was everything I had hoped and planned for. Now I have a boiler running *two* weather compensation curves, giving me the ultimate combination of convenience and efficiency. Since energy costs have increased, it makes sense to be turning the heating down very low or off during the night, when leaving the house and in any rooms that aren’t being used for periods. This saves quite a bit of money but running a boiler on highly efficient ultra-low flow temps means the house can take too long to warm up from cold. I solved this through an automation in Home Assistant. If at any time a room begins heating and the difference between the current and target temp is more than 2 degrees, Home Assistant uses the E32 entities to boost (change) the boiler’s weather curve base/end (low/high) temps from 35 / 50 degrees (low mode) to 60 / 75 degrees (boost mode). This ensures both rapid warm-up from cold and the rest of the time, ultra-low flow temps around 40 degrees. Awesome! Why don’t all boilers have dual weather curves as standard?? 🙂 My boiler flow return temps are so low it condenses continually ensuring great efficiency. I’m no technical genius, believe me. All this was no trouble to setup if you use Home Assistant, thanks to the E32. Excellent product *and* service, thanks Kees 🙂
Stefan (verified owner) –
Das Gateway läuft bisher problemlos. Aktuell nutze ich das Gateway noch per WLAN, werde aber in Zukunft die Kabelverbindung nutzen, da der WLAN Empfang im Keller eingeschränkt ist (dies liegt nicht am Gateway, sondern an der Platzierung der Access Points). Die Verbindung des Gateways mit der Wärmepumpe war mit Hilfe der Dokumentation einfach durchführbar und auch die Integration in Homeassistant hat gut funktioniert. Ich verwende das Gerät mit einer Bosch Wärmepumpe Compress 5800i und einer CS6800i Inneneinheit, sowie einem MM100 Mischmodul. Es werden insgesamt fast 250 Entitäten in Homeassistant angezeigt und die Einbindung als Sensoren, Schalter etc. funktioniert bisher ohne Probleme. Das Gateway schlägt das K30RF Funkmodul von Bosch, welches mir vom Installateur verkauft wurde um Längen, daher ist dieses nur noch für Updates der Software im Einsatz.
Klare Kaufempfehlung für alle, die etwas Zeit investieren wollen, um möglichst viele Informationen und Daten zum Heizsystem zu erhalten und dieses über ein Smarthomesystem zu steuern.
Johannes (verified owner) –
Used this to integrate my logatherm buderus heatpump into homeassistant. Works like a charm!
Gerhard (verified owner) –
Markus B. (verified owner) –
Steven S. (verified owner) –
Works perfectly with Home Assistant, Super happy, Thanks.
Malte (verified owner) –
Gerät macht einen wertigen Eindruck und funktioniert einwandfrei. Die Anbindung per MQTT an HomeAssistant klappt wunderbar. Bei der Heizung handelt es sich um eine Buderus Logamax plus GB 192-30iT40S mit RC310 und KM100.
Vlasti (verified owner) –
So far so good, seems to be working well with Bosch Condens 5000W (ZWB 37-2 A 23: 37kW – heating and DHW) and Bosch CR50 thermostat being sold in Australia.
Anonymous (verified owner) –
Sergey Sazonov (verified owner) –
Very simple installation. Just connect RJ45 and service cable to my GB162. No more. Then go to web site
Fabian (verified owner) –
Cristian D. (verified owner) –
This is exactly what I needed to integrate my thermostat and boiler into Home Assistant.
Anonymous (verified owner) –
Anonymous (verified owner) –
voldoet aan alle verwachting
Lewis Ash (verified owner) –
Jan Willem M. (verified owner) –
Super easy to install if you know your way around in your heatpump. And then boom, you have all the sensors in Home Assistant.
Pascal (verified owner) –
Used this with a Junkers CerapurCompact ZWB28-1 DE23, MM100-module and a CW400 Thermostat. The gateway can read a lot of parameters of all these devices. I use it to optimize my boiler, change setpoint, and use the Internal temperature offset to set the value of my thermostat to the average temperature of my house (I have a temperature sensor in my KNX switches in every room) via Home Assistant. To set the average temperature in my house on the thermostat I use the “Thermostat Internal temperature offset”-parameter.
Jeroen (verified owner) –
Zoltán K. (verified owner) –
Working much better, than expected. Using with Bosch Condens 3000W and CR100, everything was recognized really fast, working like charm. After a short mqtt setup in the device, Home Assistant automatically recognized everything. Really satisfied with it!
Dan (verified owner) –
I have a Worcester Bosch Greenstar 8300iw – it has a service jack but the manufacturers manual doesn’t mention or show this so I also bought the psu and ems cable.
Turned the boiler off and routed the cable through the underneath into the service jack after removing the front and bottom panel.
Connect via the AP and configured for the wifi. Connected to the network fine. Reserved in DHCP. The config that I had to do to work with Home Assist was as follows (slightly different from the wiki):
1. Create a MQTT user in HA
2. Enable MQTT on the gateway and point to HA with the user and pass
3. that’s it! All the data turned up pretty soon afterwards. I wanted it to monitor the boiler pressure.
John R. (verified owner) –
The gateway worked exactly as described in the very helpful documentation. The product makes one feel that the designer has anticipated the connection issues and provided cables and software solutions to all of them! My ems gateway is now providing reliable information from a Bosch Worcester boiler to a home control system based on Home Assistant. It will allow direct control of the heating water temperature to allow a higher temperature for domestic hot water while maintaining a lower temperature for space heating. The only shortcoming, which seems to be an EMS issue, is that the boiler cannot be switched on or off via the gateway — this requires a separate (z-wave) binary switch.