I have updated the guide on how to connect an EMS gateway into Home Assistant. The old guide was a bit outdated, and as most EMS Gateway customers use Home Assistant as their Home automation, up to date guides are necessary.
It uses a fresh install of Home Assistant version 2025.2.1 installed as HA OS on a Raspberry Pi as a starting point. So only the initial Home Assistant setup has been done. Creating a HA user and that’s it before we configure anything else.
Steps
In short these are the steps you need to take to get all the EMS entities into Home Assistant in a few minutes:
Log into Home Assistant
Create a new user in Home Assistant for MQTT
Install the MQTT integration in Home Assistant
Connect the EMS Gateway to the bus and log into the web interface
Configure the MQTT settings in the Gateway
BOOM! all entities will show up in Home Assistant within a few minutes.
Update 26 November 2024: Please update directly to the development or release version 3.7.1 because of some important bug fixes.
After 6 months and 47 beta versions EMS-ESP32 firmware 3.7.0 has finally been released. It packs hundreds of improvements, new features and bug fixes.
Updating to 3.7.0 from 3.7.0dev
If you were already on a development version of 3.7.0, you can update the firmware via the update feature of the web interface.
Updating from 3.6.4 or 3.6.5 to 3.7.0
If you are currently on 3.6.4 or 3.6.5, you cannot update via the web interface directly.
Clicking on the bin file will result in an error. This is because after 3.6.5 the firmware bin file naming scheme has changed, so the 3.6.5 firmware is looking for a bin file on the Github repository that does not exist.
You can use the table here for getting the right file.
After you have downloaded this file to your computer, you can upload it via the EMS-ESP web interface.
After the reboot of the Gateway, press F5 to clear the browser cache otherwise there may still be some left overs of the old interface in the cache, causing strange UI combinations of both the old and the new user interface.
Possible issue with updating to 3.7.0 with the E32 V2
In some cases after the new firmware upload, the Ethernet interface of the E32 V2 may be disabled. Don’t worry, it’s not dead. In these cases the board profile of the firmware has accidentally defaulted to the S32 Gateway, which has no Ethernet.
To correct this, log in to the ems-esp WiFi network, go to settings and change the board profile to E32 V2. Then save and reboot and Ethernet will become alive again.
Almost every Bosch/Buderus/Nefit heat pump with an EMS bus has 4 external inputs. These can be used to block the operation of the pump etc, but also for Smart Grid (SG) and Photo Voltaic (PV) features. You can virtually switch these inputs with all EMS Gateways to have the heat pump operate in a specific way.
Currently it’s a bit of a read and some trial and error but once set it will work automatically.
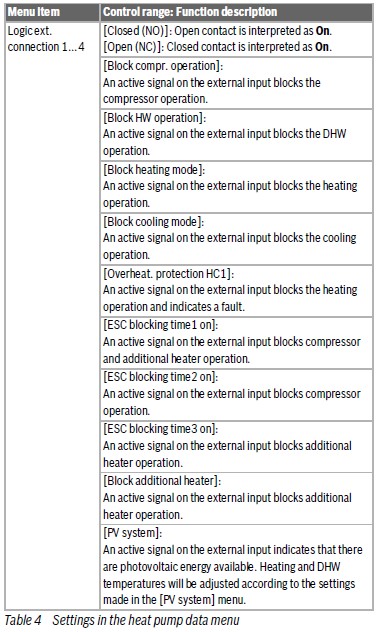
Every Bosch heat pump has 4 of these inputs, it depends on the country and your specific system but usually input 3 and/or 4 can be used for SG and PV.
You need to check the system menu or the installation manual of the heat pump to check which features are supported on which input. In the installation manual you can see which action the heat pump can do when one of these inputs is enabled. If you cannot find the information in the installation manual, you need to look up the manual for the controller/display of your unit (Likely the UI800 or HPC410).
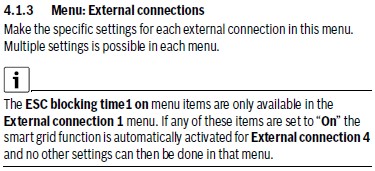
The section you need to look up is called “Menu: External connections” and will look something like below.
If you look into the following example of the installation manual of the Compress 6800i, then PV and SG are both on the input 4.
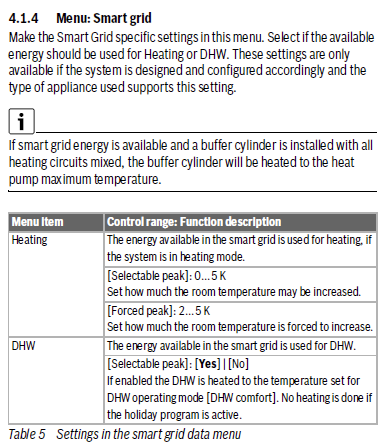
This menu will list all configurations that are possible to set for each input. The Smart Grid and PV System menu are the most interesting.
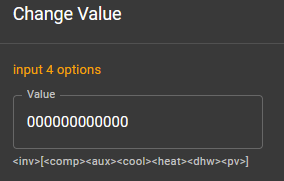
In the web interface of the Gateway you can see the input state of each input, and also the configuration of each input. In the example below the options for input 4.
If you change the configuration the the menu to the SG and/or PV feature you want to activate, you can see the corresponding input values.
You can send these same values from Home Assistant to the Gateway to enable these features.
However, the heat pump expects the actual input to be enabled. But there is nothing physically attached to the inputs. But there is a workaround. The first bit of the configuration will tell the heat pump if the signal is active high, or active low. So it should enable the function if the physical state of the input is ‘Normally Open’ and thus enabled when closed, or ‘Normally Closed’, and thus enabled when open. What we need is the second one. As the manual describes: “Open contact is interpreted as ‘ON’“.
If we invert the logic here, and attach and detach the configuration to the input every time we need it, you can turn on or off the PV and SG feature of your heat pump with your EMS Gateway.
You can use the same logic to activate the ‘EVU Sperre’ feature etc.
updated: 25 March 2026 with new images on accessing the accessory connector.
To connect an EMS Gateway to a Heatronic 3 boiler like most Junkers, Worcester and some Bosch boilers you need to gain access to the EMS/BB screw terminal inside the boiler.
The guide is for all boilers that look like this:
Step one: disconnect the boiler from power
A critical first step is to unplug the boiler from mains power for safety.
Step two: unscrew and unhinge the front cover
There are small variations between these models but in general they are held by 3 or 4 screws. Two are located at the bottom near the front. One on the left and one on the right.
On the top of the boiler there are usually also one or two screws, although some covers are held by a just a clip.
You can unscrew all screws that are holding the metal front cover. Don’t worry it won’t fall off because it is still held by clamping. Next you need to pull the underside forward and then slightly up and the whole cover will come off pretty easily. It only weighs a few kilo so it’s a simple one-person operation.
Removal instruction Junkers/Worcester front cover –Image copyright Bosch Thermotechnik GmbH–
Removal instruction Junkers/Worcester front cover –Image copyright Bosch Thermotechnik GmbH–
If it does not come off easily, there may still be a hidden screw somewhere so don’t use force and see if you missed a screw somewhere.
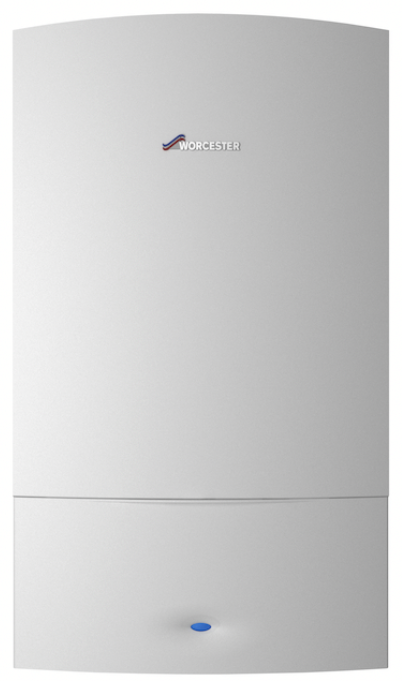
Step three: flip down the control panel
The control panel is held by a single screw on the top (nr. 1). Unscrew it and then you can flip down the control board.
Step four: Remove the connection cover
The connection cover is held by three screws. Unscrew them (nr. 1) and remove the cover.
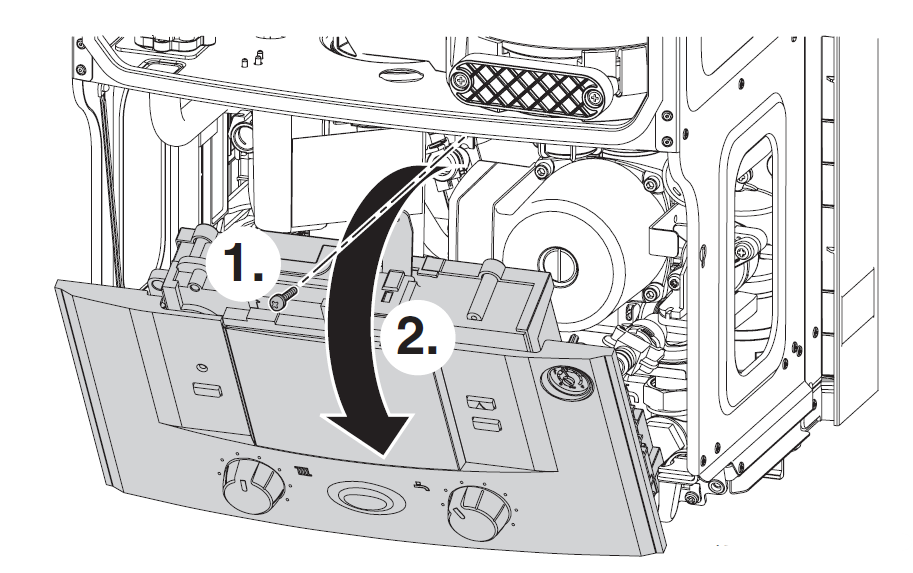
Step five: Accessing the screw terminals on the control board
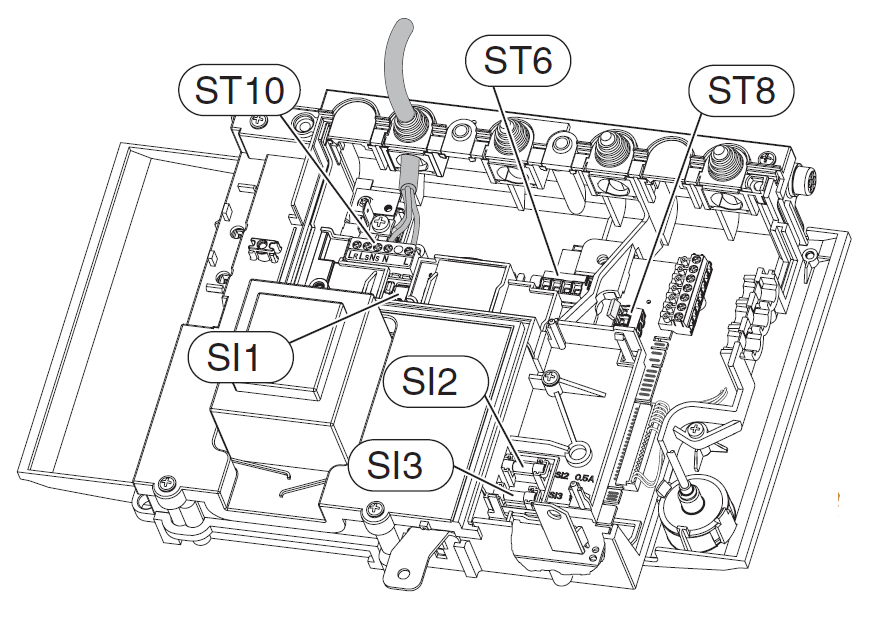
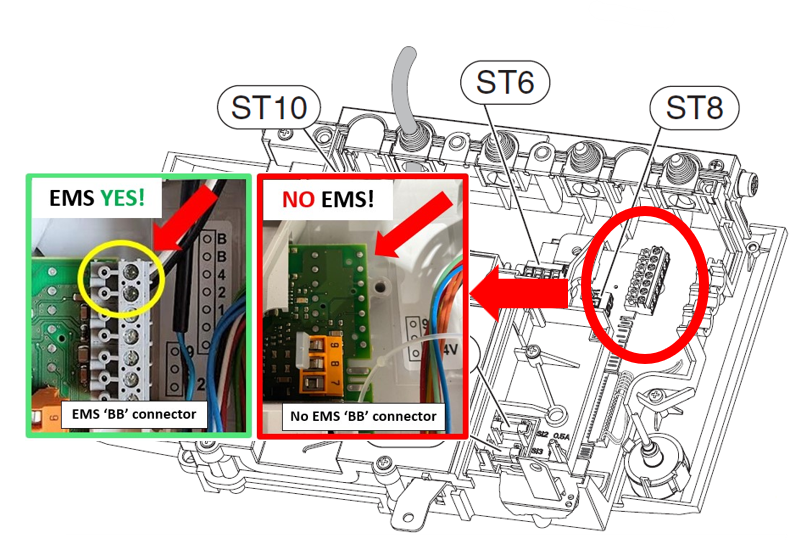
Now that the cover is off, you can access the EMS screw terminal marked ‘BB’ on the control board.
As mentioned above the EMS bus data lines are located on ST19 on the ‘BB’ terminal pins.
See if there is a grey screw terminal block mounted as above. If not, there is NO EMS bus on your boiler. If there is a terminal block, please check if there is about 15V DC between the ‘BB’ pins. If so, you can go ahead and attach an EMS Gateway to these pins. If there is nothing or only a few mV present, there is no EMS bus active on this port. You can look for it on another part of the circuit board. On Junkers boilers there is always an EMS bus present on the BB terminal.
For Worcester availability of the EMS bus on the BB pins depends on the specific boiler model and whether an integral diverter valve kit has been installed or not. For some boilers that don’t have an active EMS bus on the BB screw terminal it’s possible to swap out the code plug so it becomes active.
If you do not have an active EMS bus on the BB pins it may still be active on the accessory connector!
Accessing the accessory port
The front of the boiler has an mounting plate for an accessory. The connector for this accessory also has the EMS bus present.
You can slide the accessory cover upwards by pulling the pull tab on top of the cover. You can then pull the cover a bit forward and gently wiggle it out. The accessory connector has three gold plated contacts.
Removing accessory cover on Junkers/Worcester boilers
EMS bus pins on accessory connector
The outer two pins should have an active EMS bus.
EMS bus measurement on accessory connector
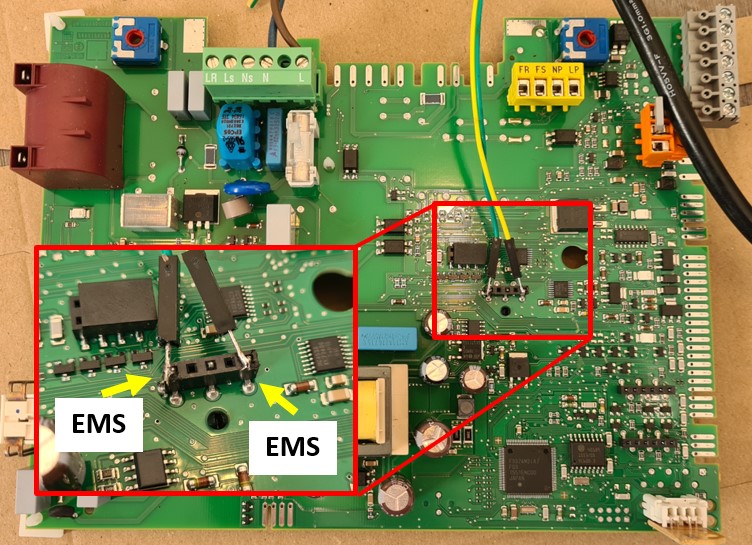
If there is already an accessory mounted here, you can also access this connector on the other side of the circuit board to solder wires on. See the image below. Also see the wiki HERE.
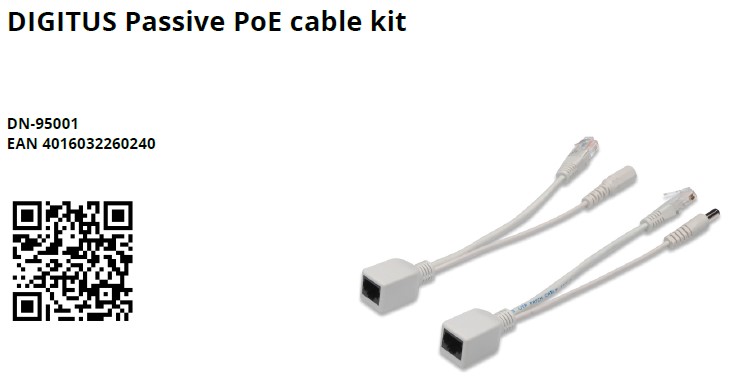
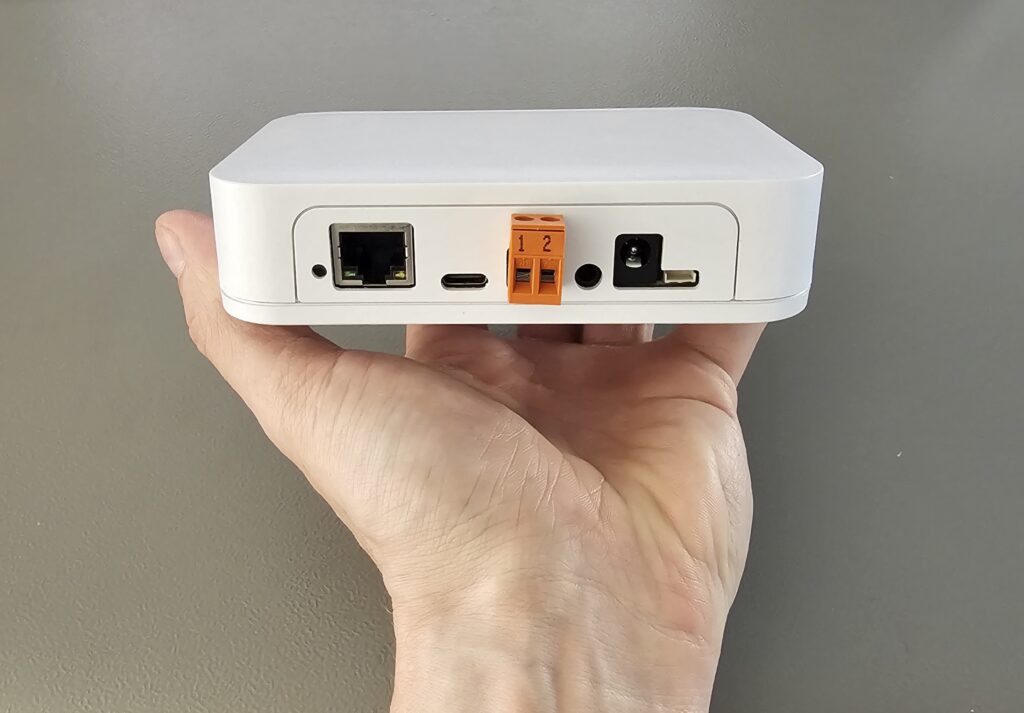
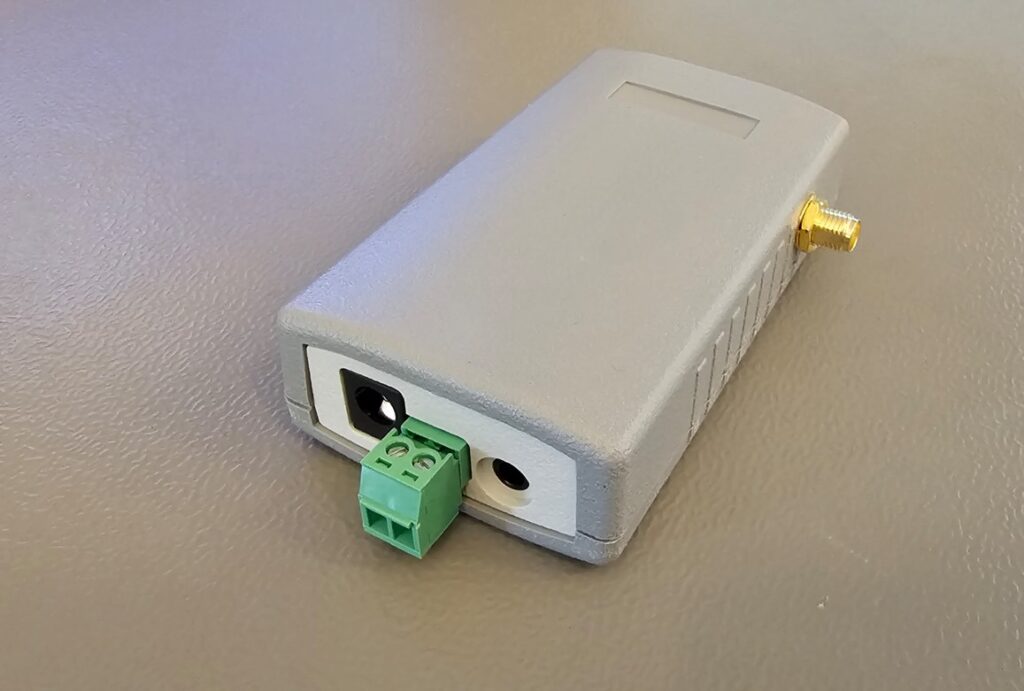
Sometimes there is no easy way to make a 230V wall outlet or power socket near the boiler or heat pump. The E32 V2 has Ethernet, but is does not support active POE (Power Over Ethernet), which is usually 48V or 24V.
What you can do instead is use a so called ‘passive POE cable kit’ like the Digitus DN-95001 to inject the 12V DC of the BBQKees Electronics power supply to the E32 V2 over the same Ethernet cable as the LAN signal.
Each Ethernet cable has 8 leads, 4 of which are used for data and the other 4 are used for power.
These cable kits will also work for longer distances of Ethernet cable where the 12V voltage may drop a bit, because the E32 V2 will still work with f.i. 9V DC. And the bitrate of the connection is relatively low at just 100Mbit.
Below an image of such a cable kit. The female Ethernet connectors are for connecting to the Ethernet cable from the router location to the Gateway location. And then one side has a Ethernet plug which you plug into your router or switch and a female receptacle for the 5,5mm DC barrel jack plug of the 12V DC power supply. The other cable in the kit has a male Ethernet plug and a 5,5mm male barrel jack plug for connecting to the Gateway.
Below an example setup. On the left you connect the combiner cable to your router or switch, and you plug in the 12V DC power supply to the connector on that cable. On the receiving end you connect the incoming Ethernet cable to the splitter cable, and then the Ethernet plug of the splitter cable and the barrel jack plug into the E32 V2.
Please pay attention if your switch or router has 24V or 48V POE enabled on that specific port and you are using this passive cable set at the same time, you may blow up the Gateway. Of course I do not give any warranty if you fry the circuit board. Furthermore this page is just for reference. Always know what you are doing when messing with voltages and cables. The above example may or may not work in your specific situation.
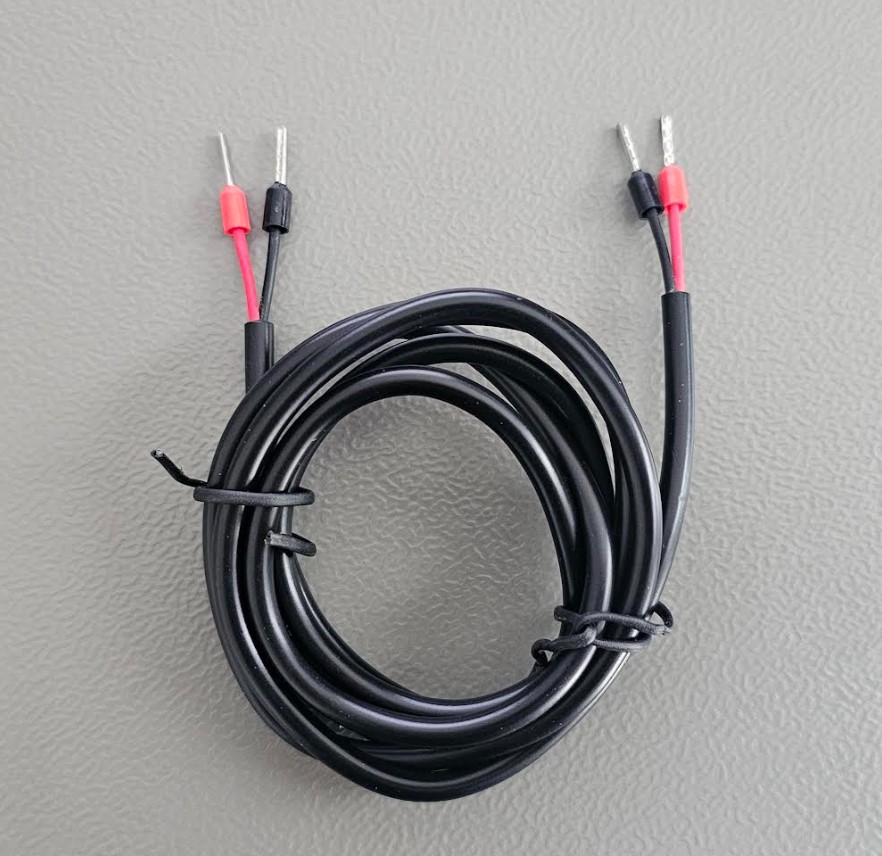
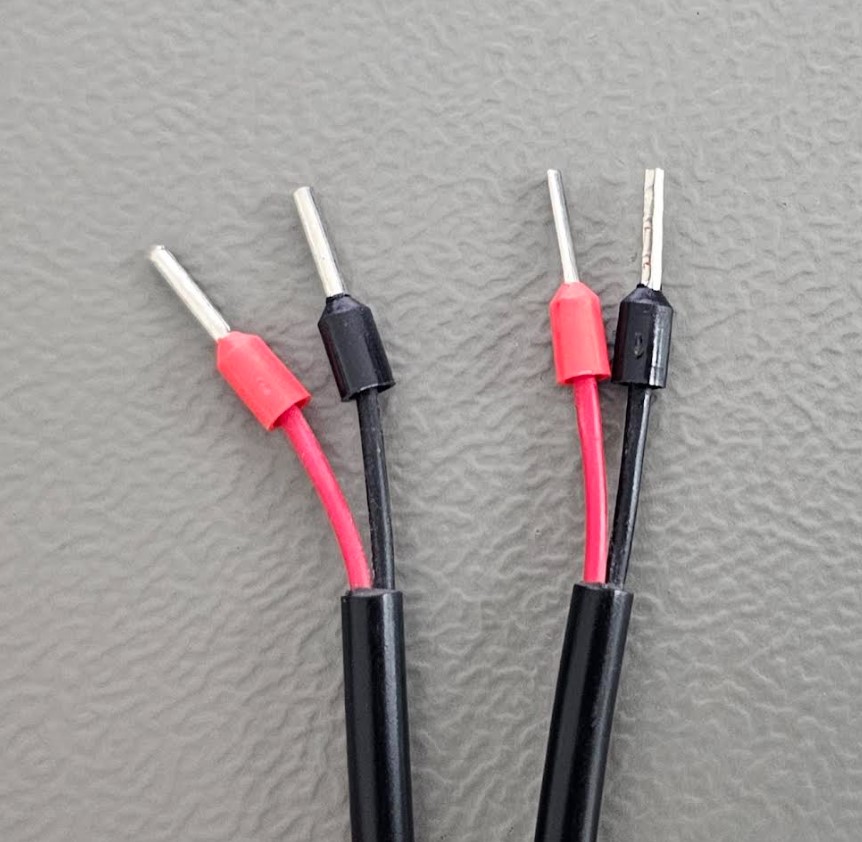
Since the end of April 2024 I have a new version of the EMS screw terminal cable.
It’s still a 100cm cable with two stranded copper cores of 2×0,5mm2 and the wire ends terminated with a wire ferrule, but now the cable is black and a bit thinner and more flexible than the previous grey cable.
You can find the cable here or you can include it as an option on the Gateway and Interface board product pages.
Below on the left the ‘old’ version of the cable and on the right the new version.
Some more product images:
You use this cable to connect the orange or green screw connector of the Gateway to the EMS screw terminal inside the boiler or heat pump.
It took a bit longer than expected but the first batches of the new Gateway model E32 V2 with WiFi and LAN are now available.
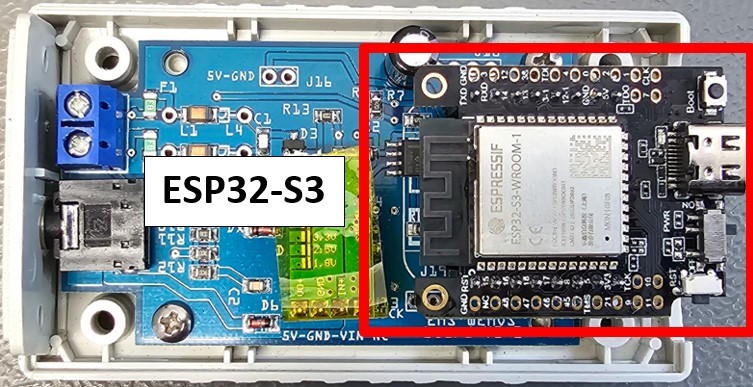
It has all the awesome features of the S3 Gateway with the same EMS-ESP32 firmware but aside from WiFi it has an additional RJ45 Ethernet port for wired networking. Because the ESP32-S3 chip of the S3 Gateway does not support hardware Ethernet we used a big ESP32 module instead but with a beefy 8MB PSRAM and 16 MB Flash. This solves all the little memory issues of the previous E32 some users might be experiencing with the latest 3.6.x firmware when used with larger EMS systems.
Although the E32 V2 hardware has 8MB of PSRAM, currently the EMS-ESP32 firmware only supports 4MB PSRAM on the ESP32. 4MB is more than enough for now, but if needed this can be increased to 8MB in the future. Furthermore EMS-ESP32 currently only needs 4MB of Flash storage, so with 16MB of Flash storage in the E32 V2 there is lots of room for more features.
Because the circuit board did not fit anymore into the grey enclosure of the E32 V1.0/V1.5 and the S3 a new enclosure was created. It also has mounting holes on the back. Furthermore it is UL 94 V level fire retardant.
The E32 V2 went through several rounds of prototyping and is of course CE certified and manufactured according to the RoHS directive. The LAN port provides a very stable interface. POE is not included though, non-isolated 48V is not a good match with the 16V EMS bus.
Currently there may be limited availability of this model, from March onward continuous stock is expected.
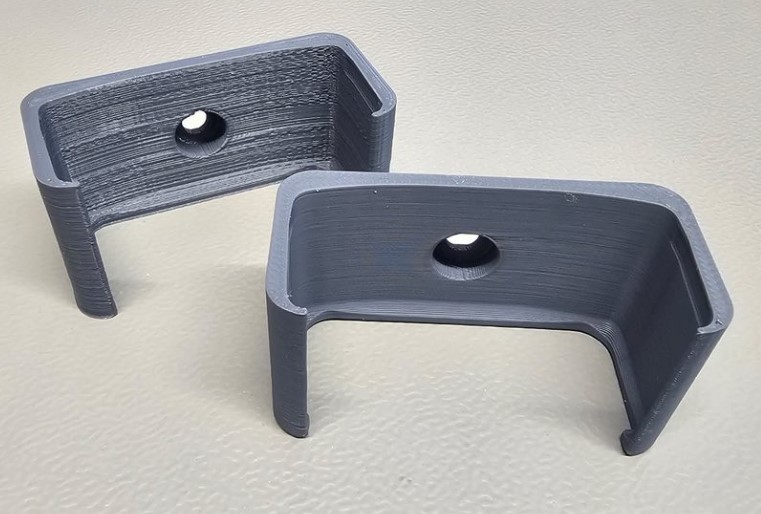
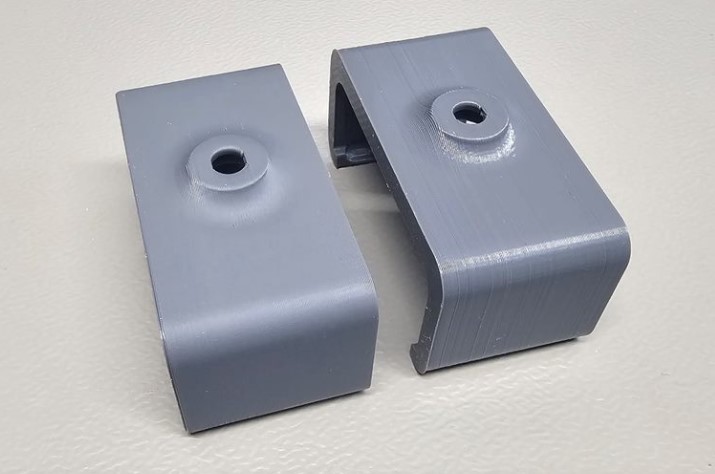
The wall mount bracket for the S3, S3-LR, S32, E32 and older models is 3D printed.
We are now printing the brackets on a Bambu Lab X1 Carbon printer. The quality has been improved dramatically. The left image shows the ‘old’ bracket on the left versus the ‘new’ bracket on the right. both are printed with the same filament. You can now hardly see it’s 3D printed.
As time progresses so does the EMS-ESP firmware. We were now at a point were EMS-ESP would benefit from some more RAM memory.
That’s why BBQKees Electronics is introducing the new EMS Gateway S3 models. One with the default on-chip antenna and an identical Gateway model with an external high gain antenna for those area’s with low WiFi reception. These are the replacement for the very popular S32 Gateway.
Hardware changes
The S3 models looks and feel identical to the EMS Gateway S32 V2.0 they are replacing but they now come with an ESP32-S3 module with 16MB Flash and a hefty 8MB PSRAM (in addition to the on-chip 512KB RAM), which makes it more suitable for large EMS systems with a heat pump or multiple zones/heating circuits.
The new hardware continues using the existing third-gen BBQKees EMS detecting and sending circuitry design as in the S32 Gateway and the EMS Interface board V3’s, which has proven extremely reliable and robust over the years for all EMS types across all Bosch brands.
Aside from the more powerful chip, this model now also features an external USB-C connector for manual firmware updates (if ever needed). The USB-C connection makes use of the internal USB OTG controller of the ES32-S3 so we don’t need the CH340 chip and driver anymore.
What has remained unchanged are the positions and pinout of the external connectors so the S3 is a direct replacement for S32 setups. Only the LED lightguide was changed a bit.
The power options via the service jack or 12V DC power supply also remained the same.
Firmware
The S3 models will be loaded with firmware EMS-ESP32 v3.6. This is exactly the same firmware with the exact same features as for the S32, just built for the different chip architecture of the S3. The 3.6 firmware contains a number of new features over 3.5.1, most notably further memory optimizations.
Upgrade discount
If you already own an S32 Gateway it’s probably not really worthwhile to upgrade to the new S3, but if you want too or if you still have an old ESP8266 Gateway like the Premium II you can get a 15% discount on a new S3 Gateway of your choosing. Just use the contact form to contact me with your previous order ID and I’ll give you a discount code.
The ESP8266 module in older Gateways like the Premium II can be upgraded to another module in the same format.
The MH-ET Live ESP32 module was a good choice to upgrade the ESP8266 to an ESP32 chip.
Now available in the webshop a soldered and LilyGo T7-S3 board with an ESP32-S3 chip and 16MB Flash and 8MB PSRAM. It’s programmed with EMS-ESP for your convenience. This new upgrade module is so powerful you probably never need any other upgrade again.
For the ESP32-S3 a different bin file is available on the EMS-ESP repository for EMS-ESP 3.6 and later.